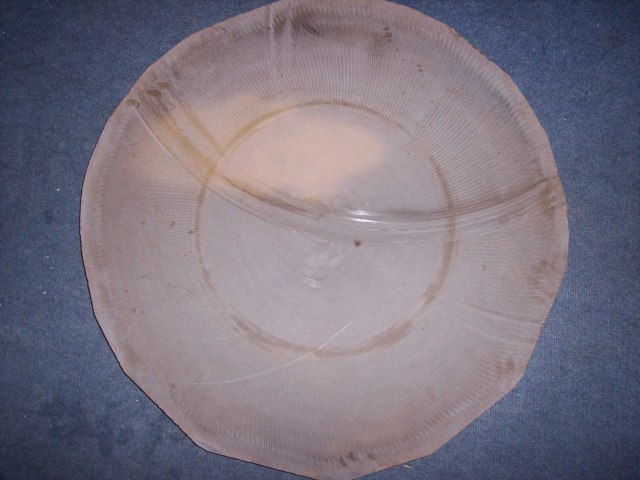
Starting point were two raw chipped bodys of glass like this one
The 28 inch f/4,8 Bino Telescope of Joerg Peters
Text and images from Joerg Peters Copyright ©
Production of the optics:
Optical mirror diameter: 708 mm. Focal lenth: 3.425 mm. Edge thickness: 38 mm
Starting point were two raw chipped bodys of glass like this one
Generating a round rim at the self made machine
After that the back sides of the blanks were ground against each other
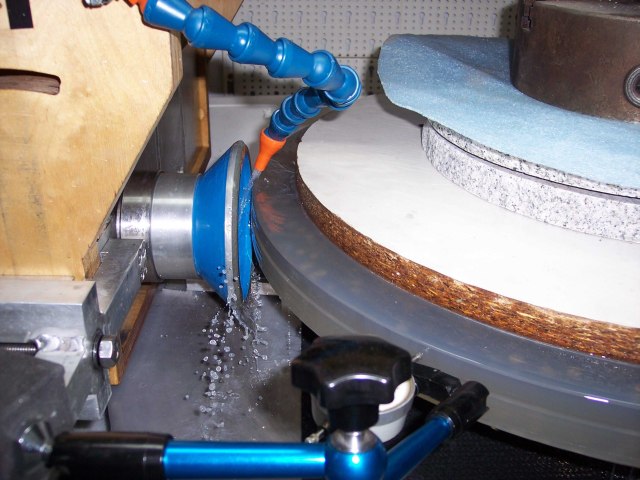
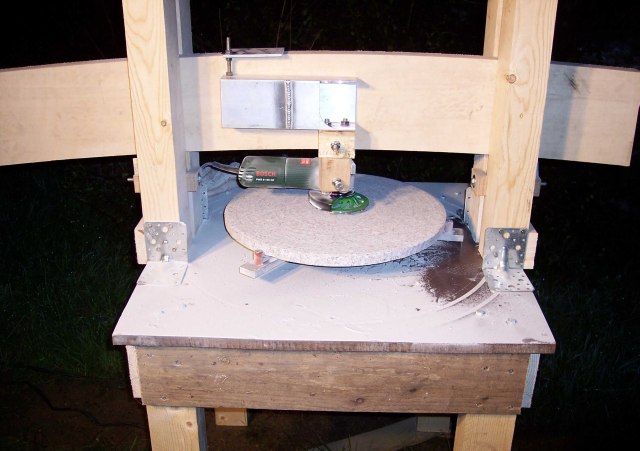
Generating the concave curvature with diamond tool and cooling lubricant.
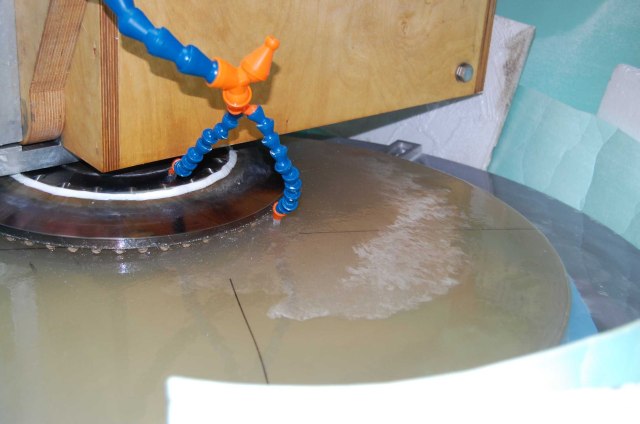
Raw pre milling the granite tool. Works fast but is rough. Cooling lubricant isn't required for the granite tool.
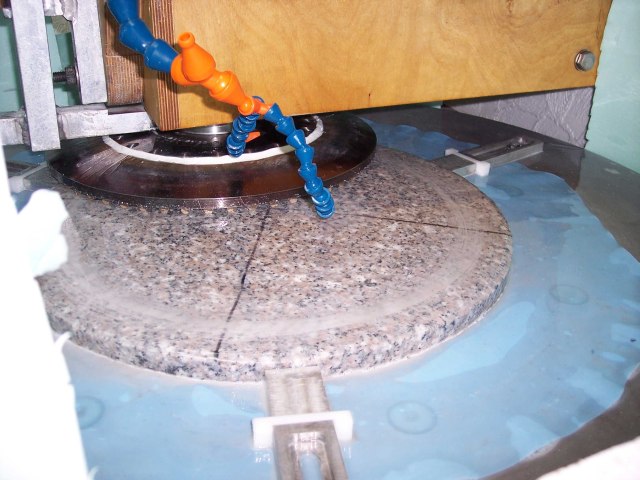
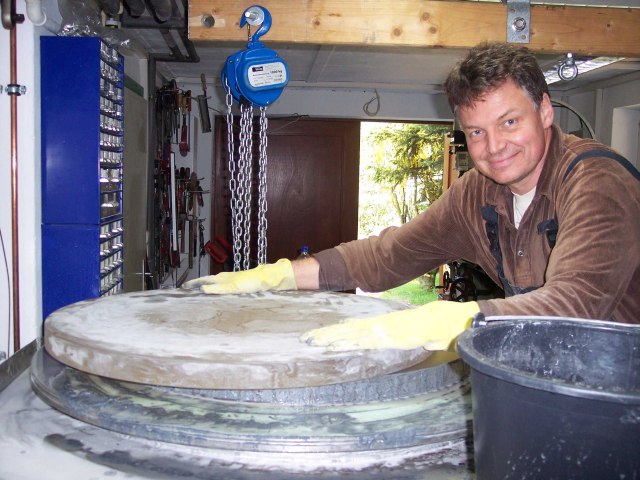
Fine grinding of the granite tool on the machine.
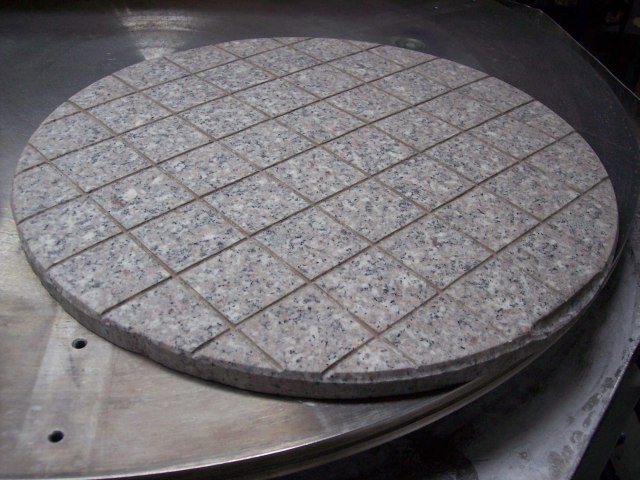
The finished tool (diameter: 490mm) with channels for better abrasive distribution and against sticking the tool on the blank.

After polishing with the large granite tool parabolizing was done by using smaller tools and even mini tools. Special thanks to Alois Ortner who had always an open ear for me and taught me in his successful minitool method. The smallest tool used, had a diameter of 23 mm. The minitool method needs a huge amount of time but can be controlled very precisely.
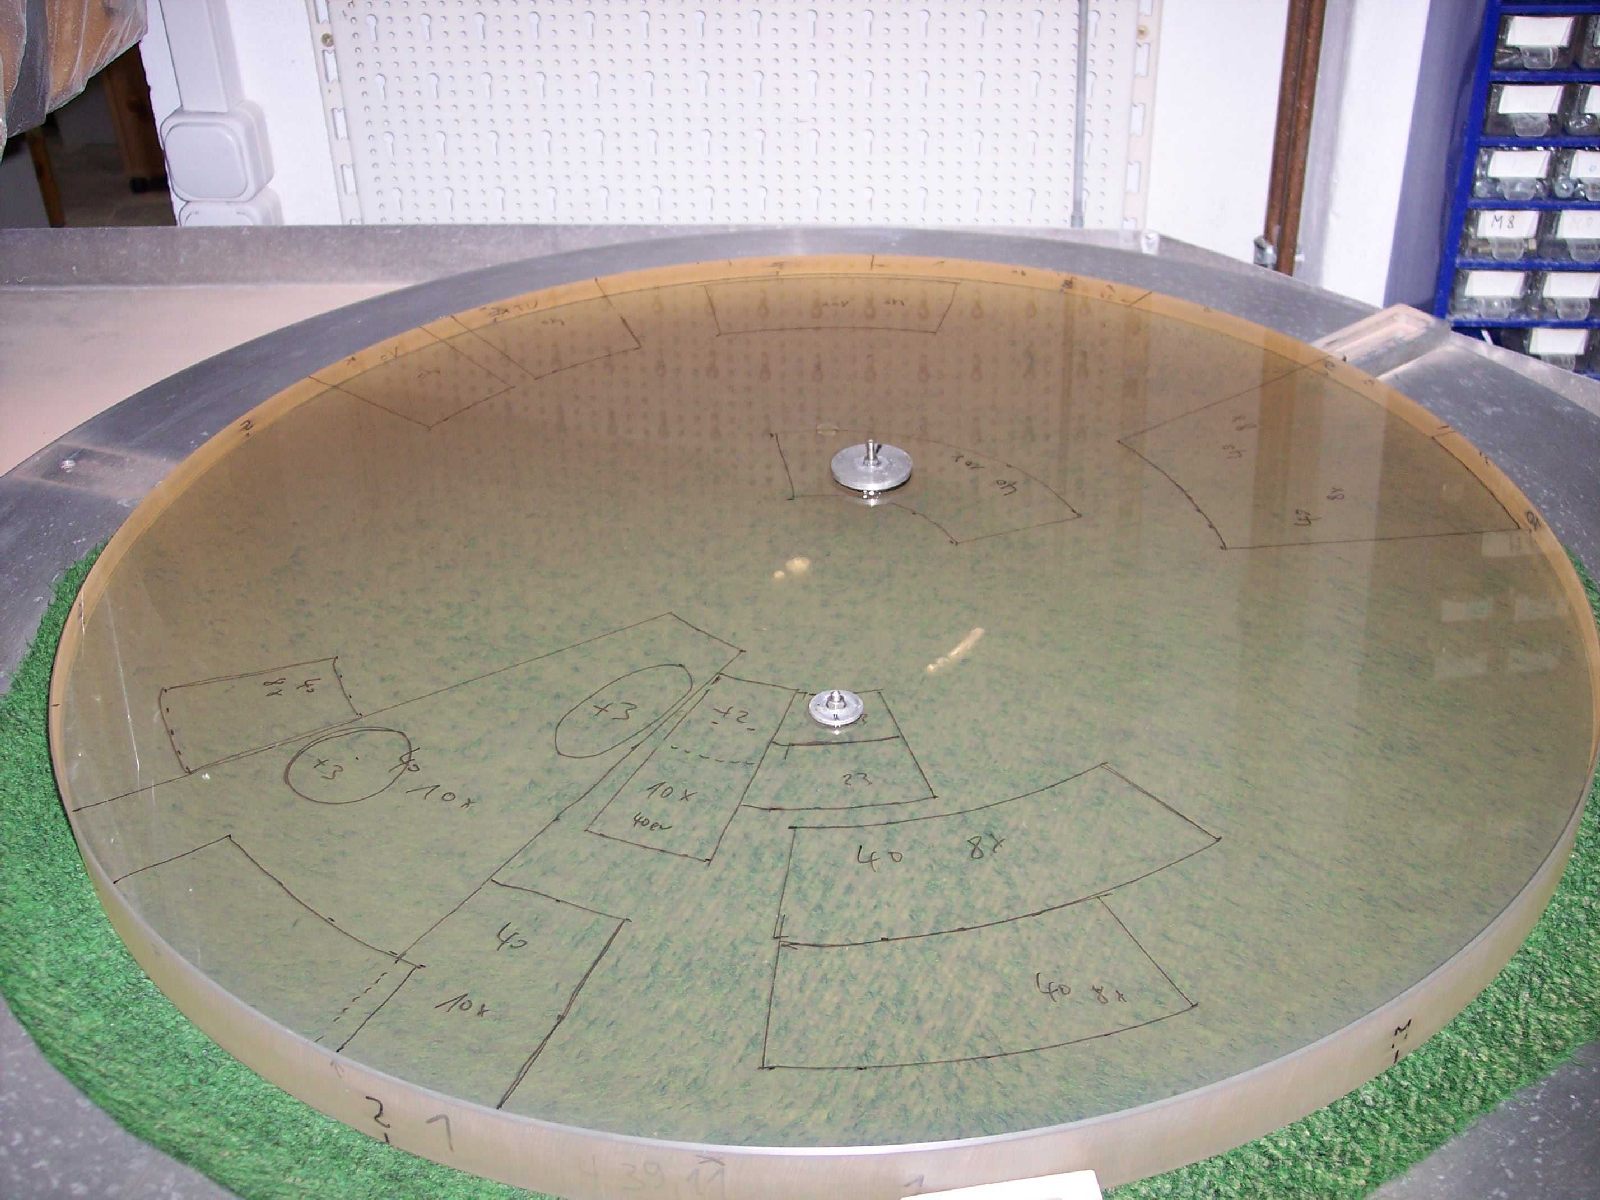
See here an example of how the next polishing session was prepared. The drawing shows where to remove glass

After local polishing the topography of mirror was evaluated by using a Bath interferometer. At the final stages the ratio between polishing and evaluating was 5 minutes polishing versus one whole day measuring, evaluating and planning the next polishing session. The analysis was executed with the brilliant program "Open fringe" from Dale Easen. Dale, thank you very much for providing. Without this program it would be impossible to make optics of that quality.
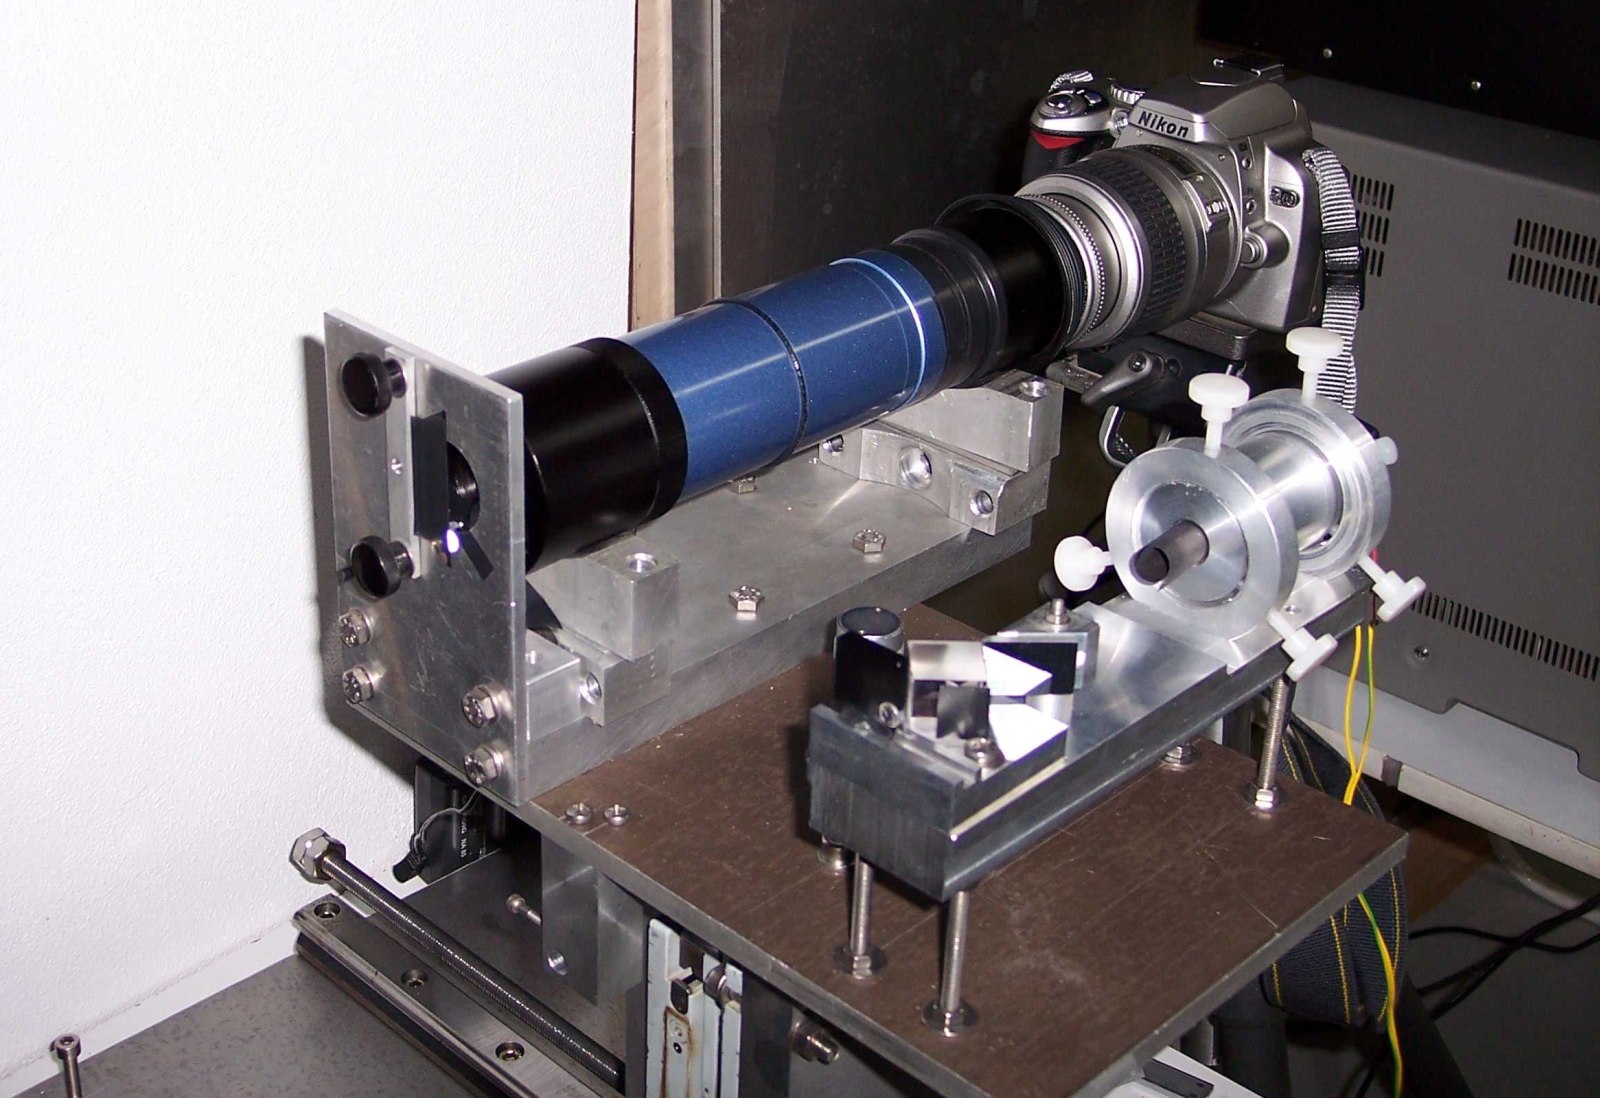
The measuring equipment: The Bath interferometer was used for surface measuring and the Foucault tester for getting the ROC.
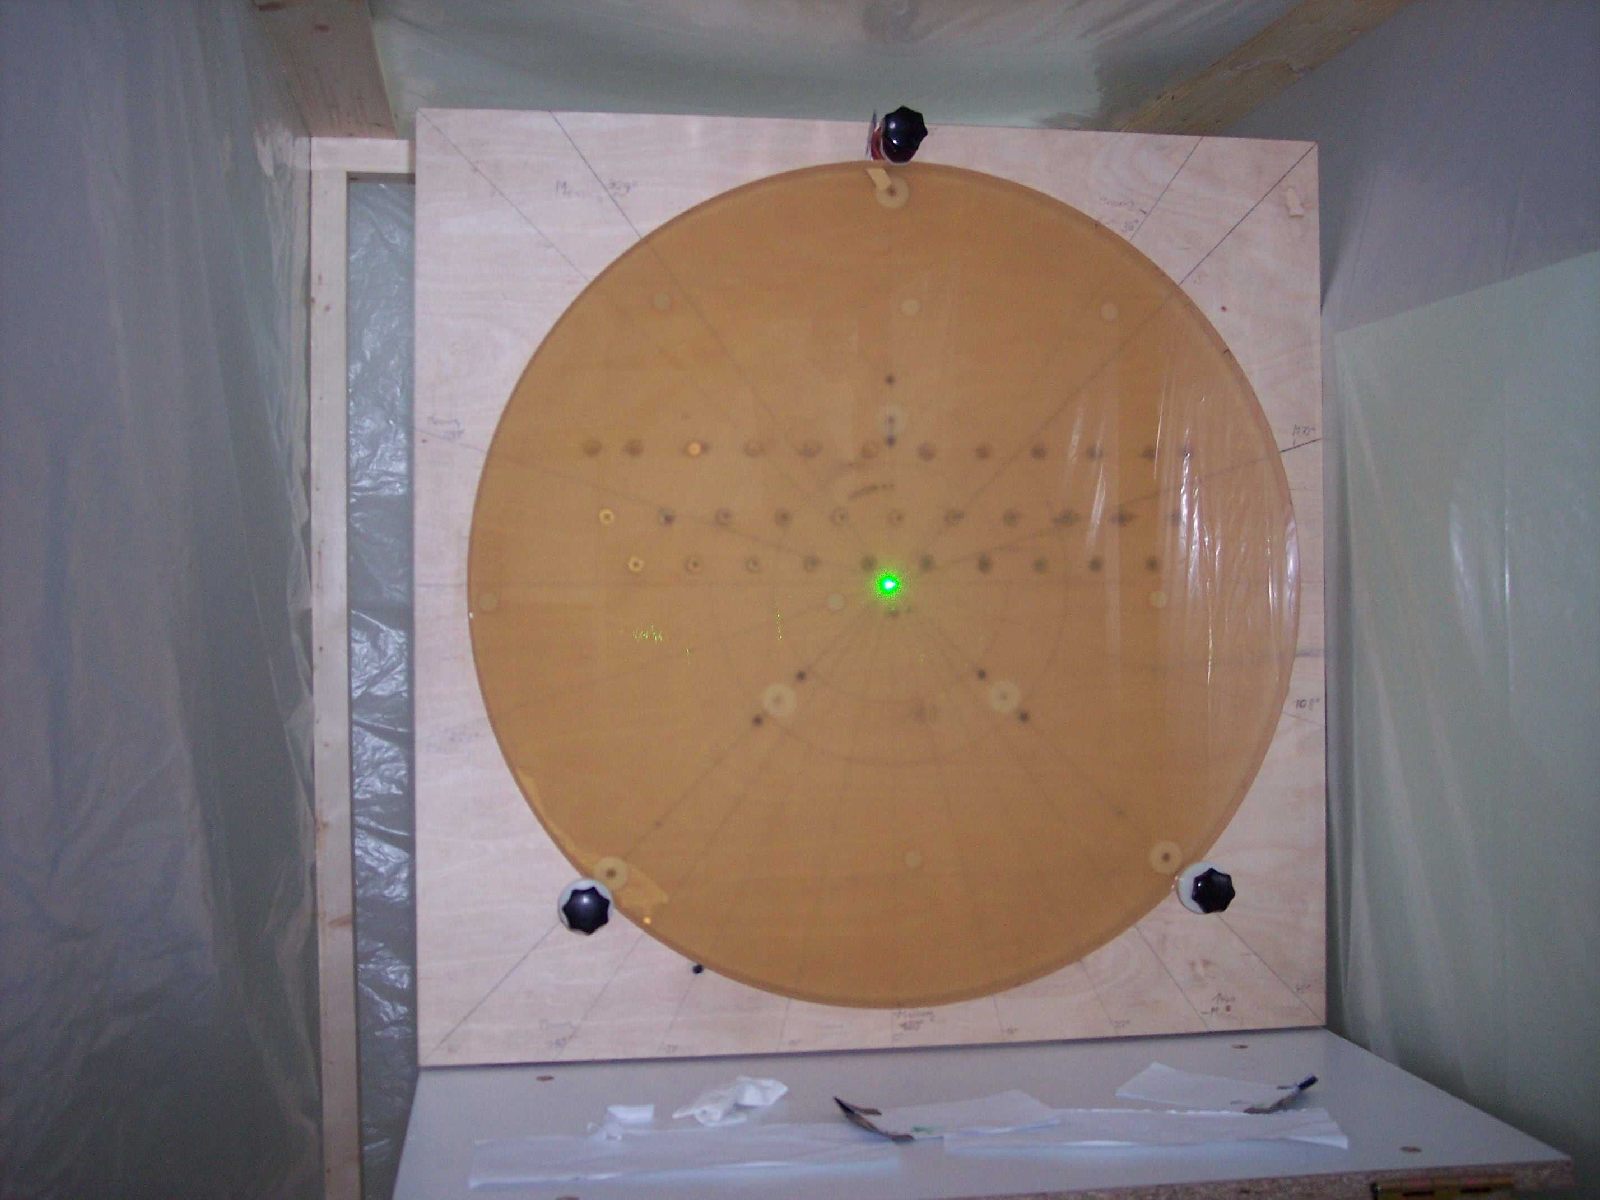
The test stand supports the mirror in upright position at +/- 45° by using small supports acting exactly at the centroidal axis. The mirror should be balanced in such a way, that it can float almost free on the two supports, applying no additional moments into the mirror. This is essential to get repeatable results!
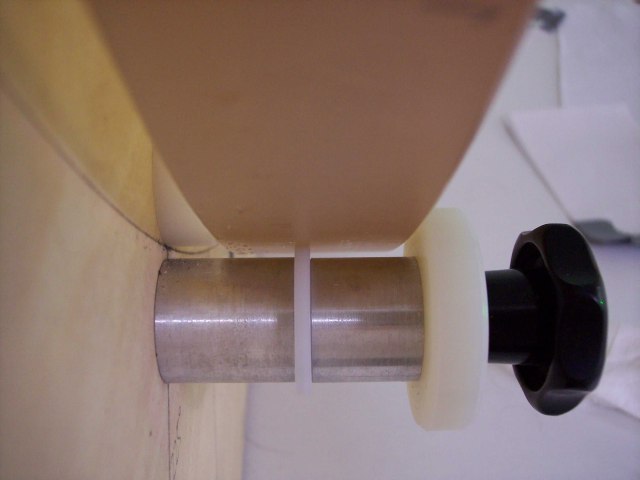
The lateral supports at the test stand
My mirrors have a thickness of 38mm, therefore all has to match perfectly for a sure measurement. In upright position the mirror generates fold-astigmatism and trefoil at the support points due to it's own weight. The thinner the mirror the larger is this effect. This is no error of the mirror itself.
Open Fringe allows to average many interferograms, to differentiate between mirror errors and test stand influence. By rotating the mirror on the test stand to different position angles and rotating back the shot interferograms per image processing program, all interferograms stay at the right position above each other for averaging. As the the test stand doesn't rotate, the test stand influence is averaged out. After several experiments I found the best compromise between accuracy and time effort being at 72° rotation angle. Per position angle 4 interferograms with different fringe orientations were taken. 5 positions with 4 interferograms for each position deliver 20 interferograms which have been analyzed in Open Fringe, to get one total result. Increasing to 10 positions (every 36°) did not increase the accuracy, whereas less than 5 positions gave to large deviations for my taste.
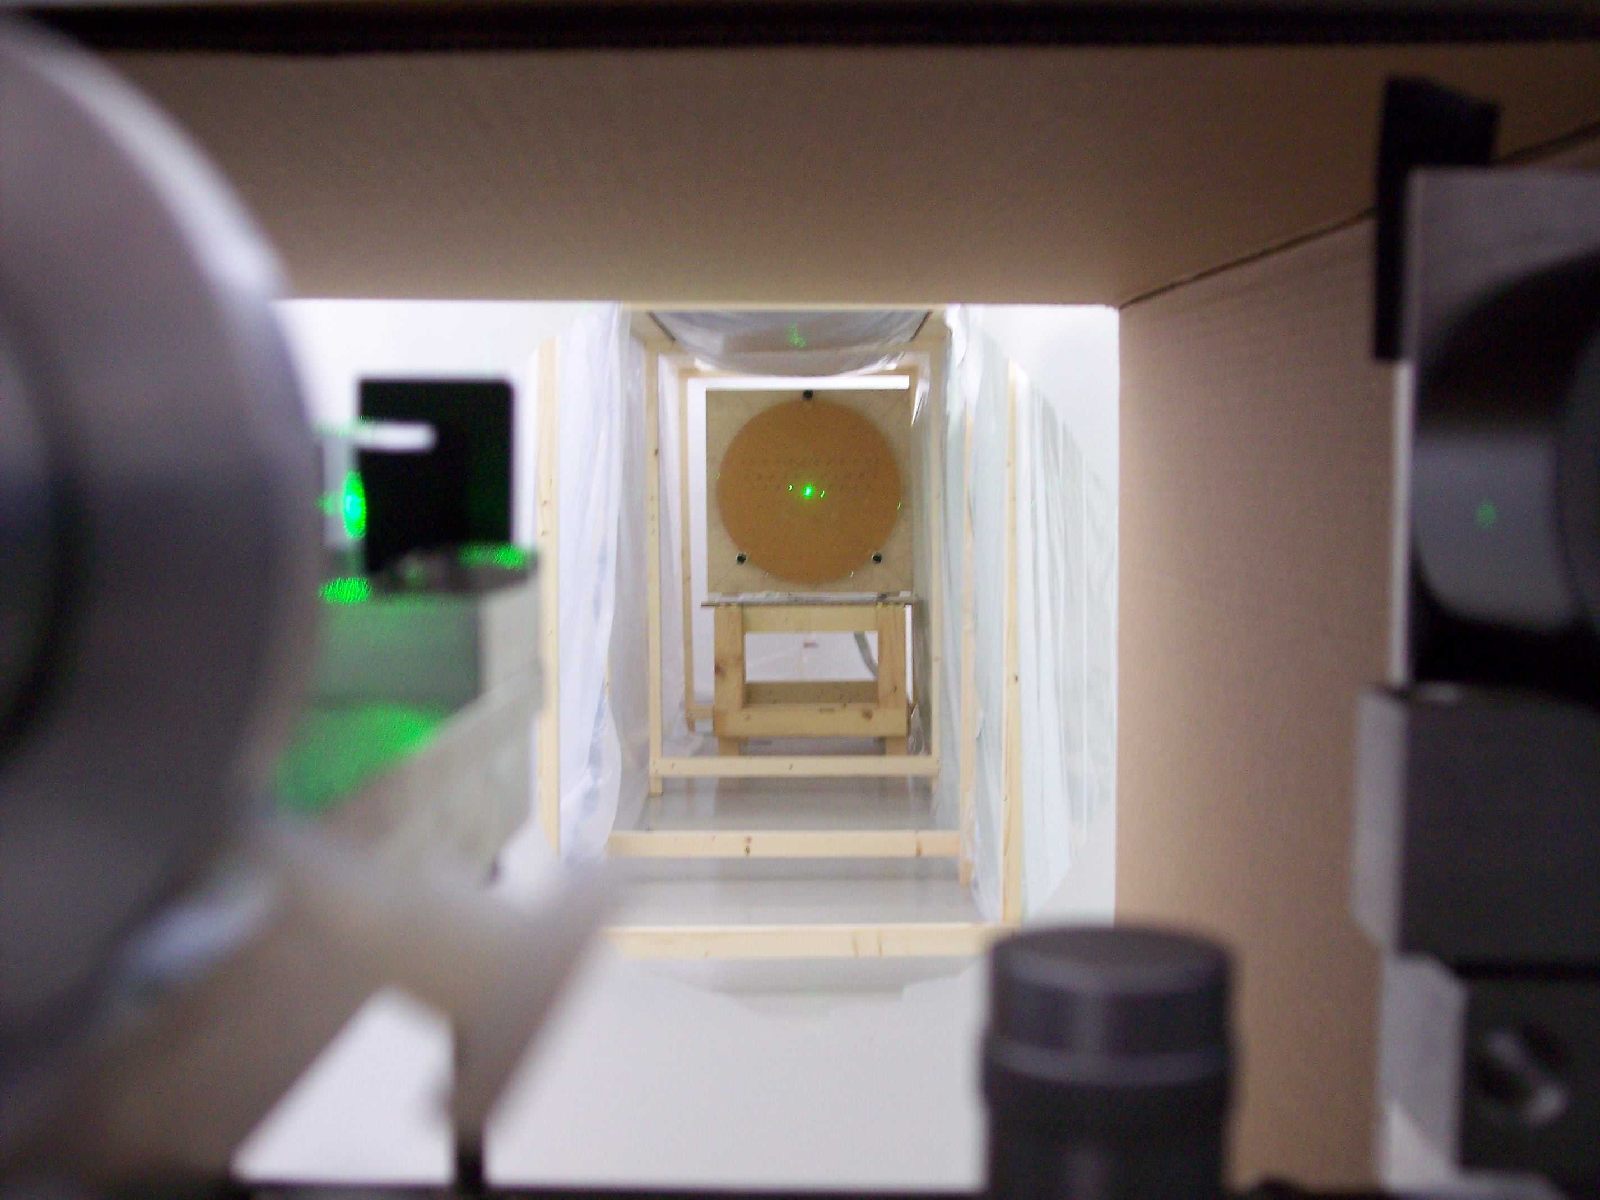
A closed tunnel from the mirror to the interferometer was built, to beat air turbulence in the room. This is essential for a repeatable measurement.
The results showed, that my considerations were right. I am very satisfied with the mirrors:
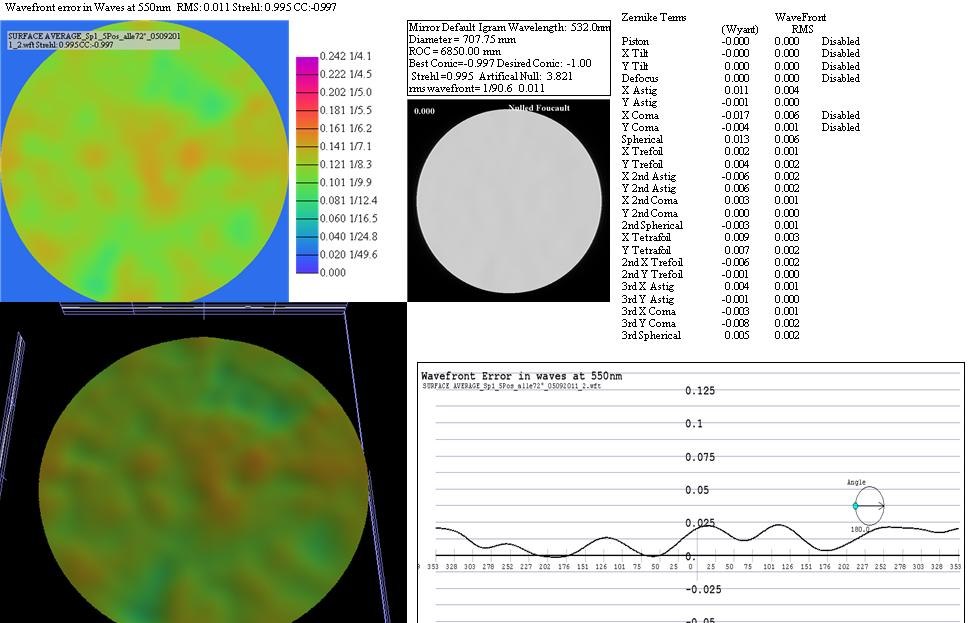
Mirror No. 1 ready, only X Y Coma disabled
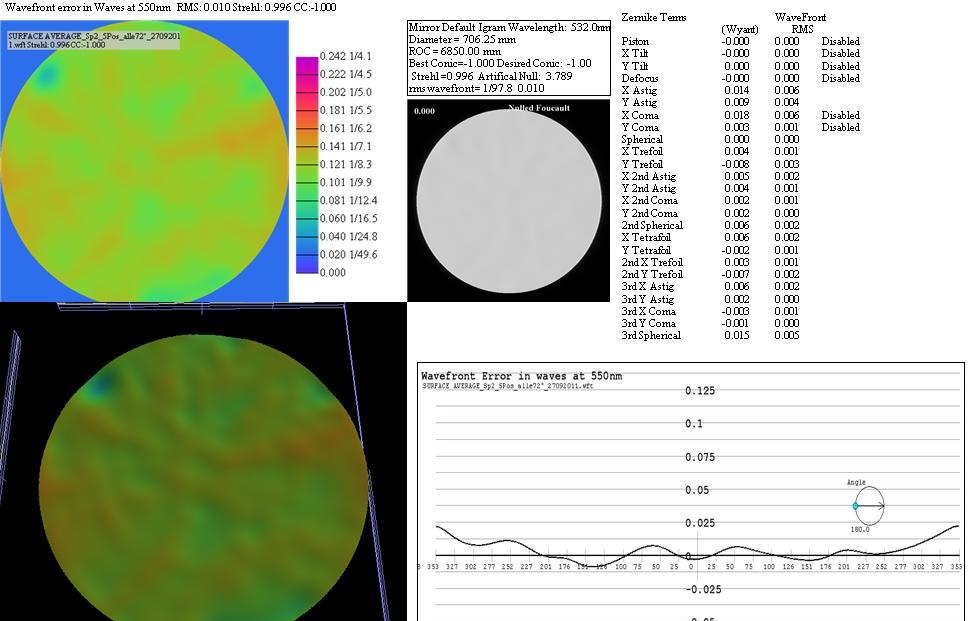
Mirror No. 2 ready, only X Y Coma disabled.
For the Open Fringe specialists: For analysis I used the FFT method, polishing with LPF 0.06, no smoothing. In the diagrams shown above only X and Y Coma is disabled from the Wave Front Zernikes and LPF is 0.02, no smoothing or other deactivations.
Although coma can be collimated away in a Newtonian and therefore coma can be disabled in the analysis, I wanted to make my mirrors almost free of coma. Therefore I left the coma tags active during polishing, to see how far I can eliminate the coma.
This is the results without any deactivations:
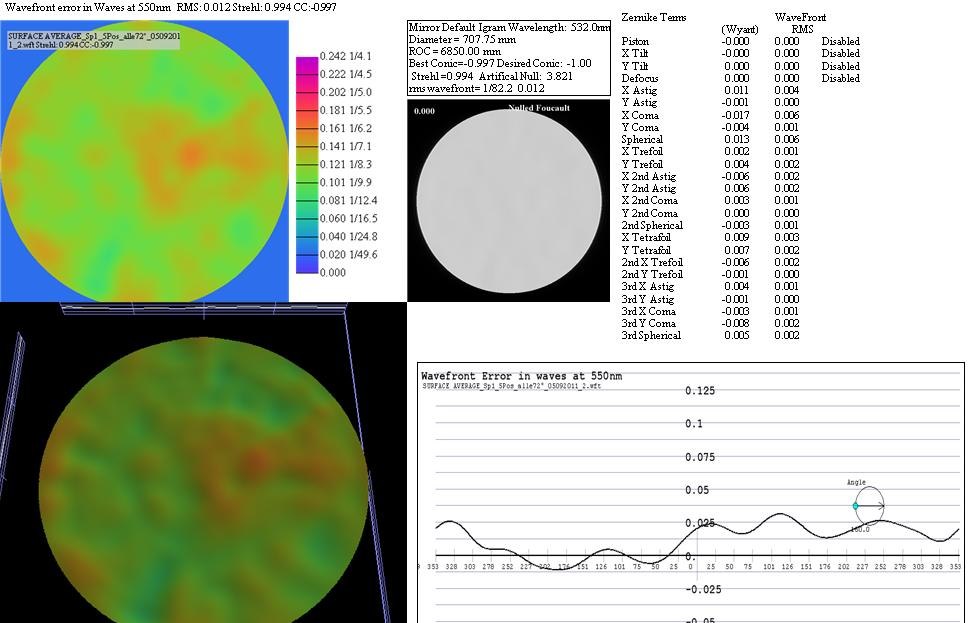
Mirror No. 1 ready, no deactivation

Mirror No. 2 ready, no deactivation