| Home | Material | My Telescopes | Mirror Making | Deep Sky | ext. Links |
| Tipps und Tricks | Typische Fehler | Selbstbau München | Projekte | Links Spiegelschleifen |
| Deutsch (de)![]()
| Home | Material | My Telescopes | Mirror Making | Deep Sky | ext. Links |
| Tipps und Tricks | Typische Fehler | Selbstbau München | Projekte | Links Spiegelschleifen |
50 cm f/5 Mirror Edge- Correction and Parabolizing
When polishing telescope mirrors amateur mirror makers frequently face the phenomenon "tuned down edge" or more correct "lagging edge". This means, that the edge area has a too long radius of curvature (ROC) compared to the rest of the surface. Usually this happens, when the inner part of the mirror is polished stronger than the very outer part, so the middle is deepened more and more, while the edge area is left behind with a too long ROC. How this can be avoided see my Tipps und Tricks (German text) at polieren, zurückgebliebener Randbereich. Once the error has occudred, it seems to make trouble, to correct it and some feel forced, to go back to fine grit stage. Therefore I want to show on an example of a 20 inch mirror, how an even strongly pronounced long focusing edge area on a mirror of this size can be corrected efficiently. For smaller mirrors alternatively a full size ring tool can be used.
|
|
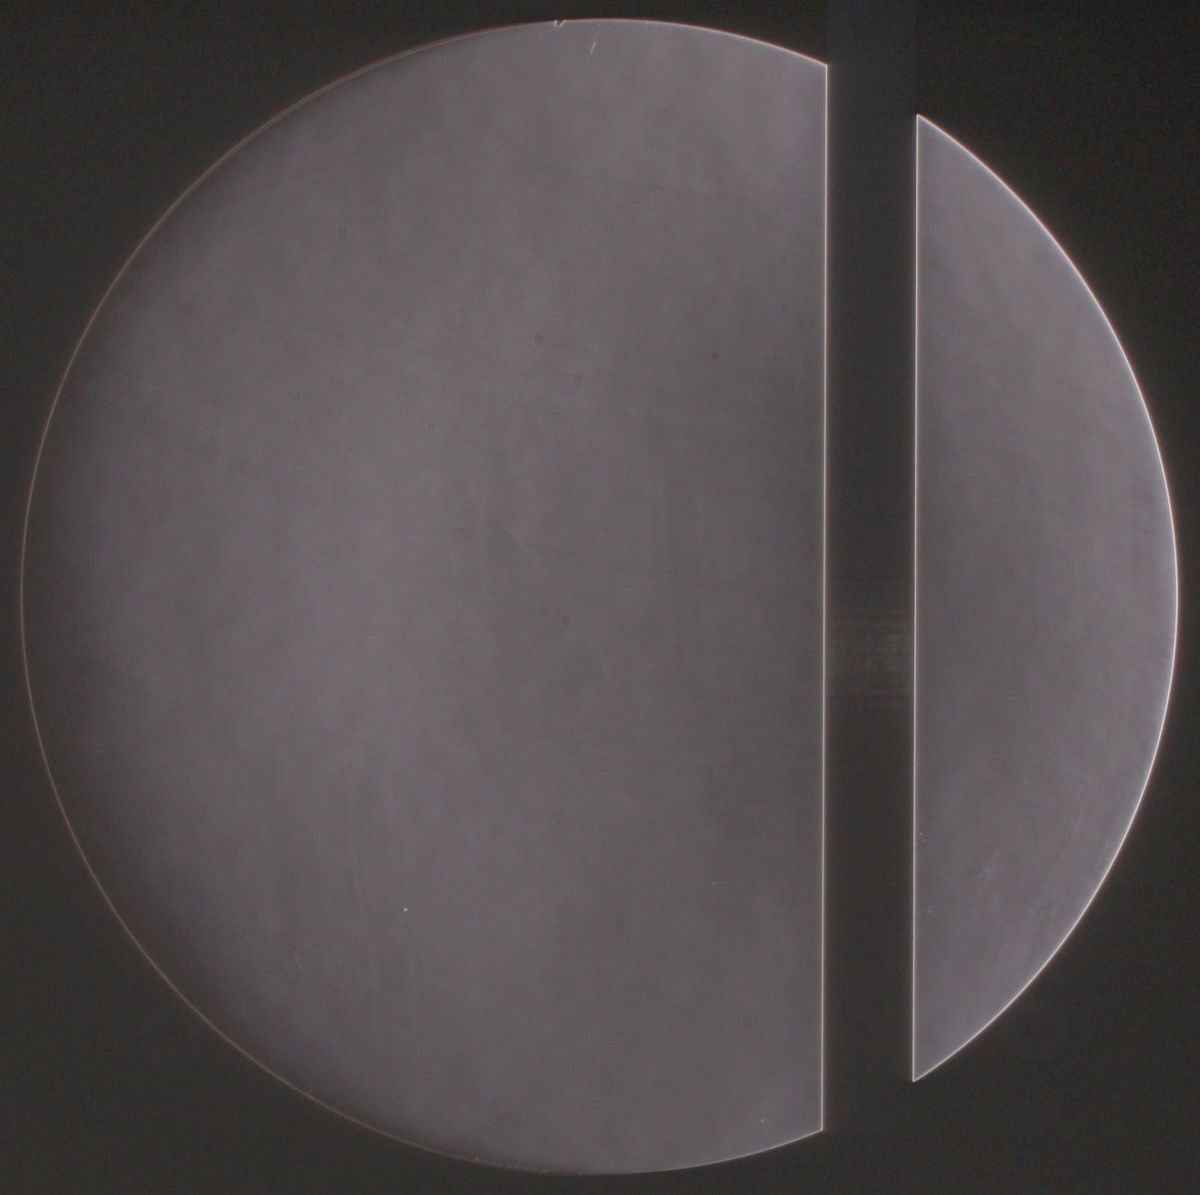
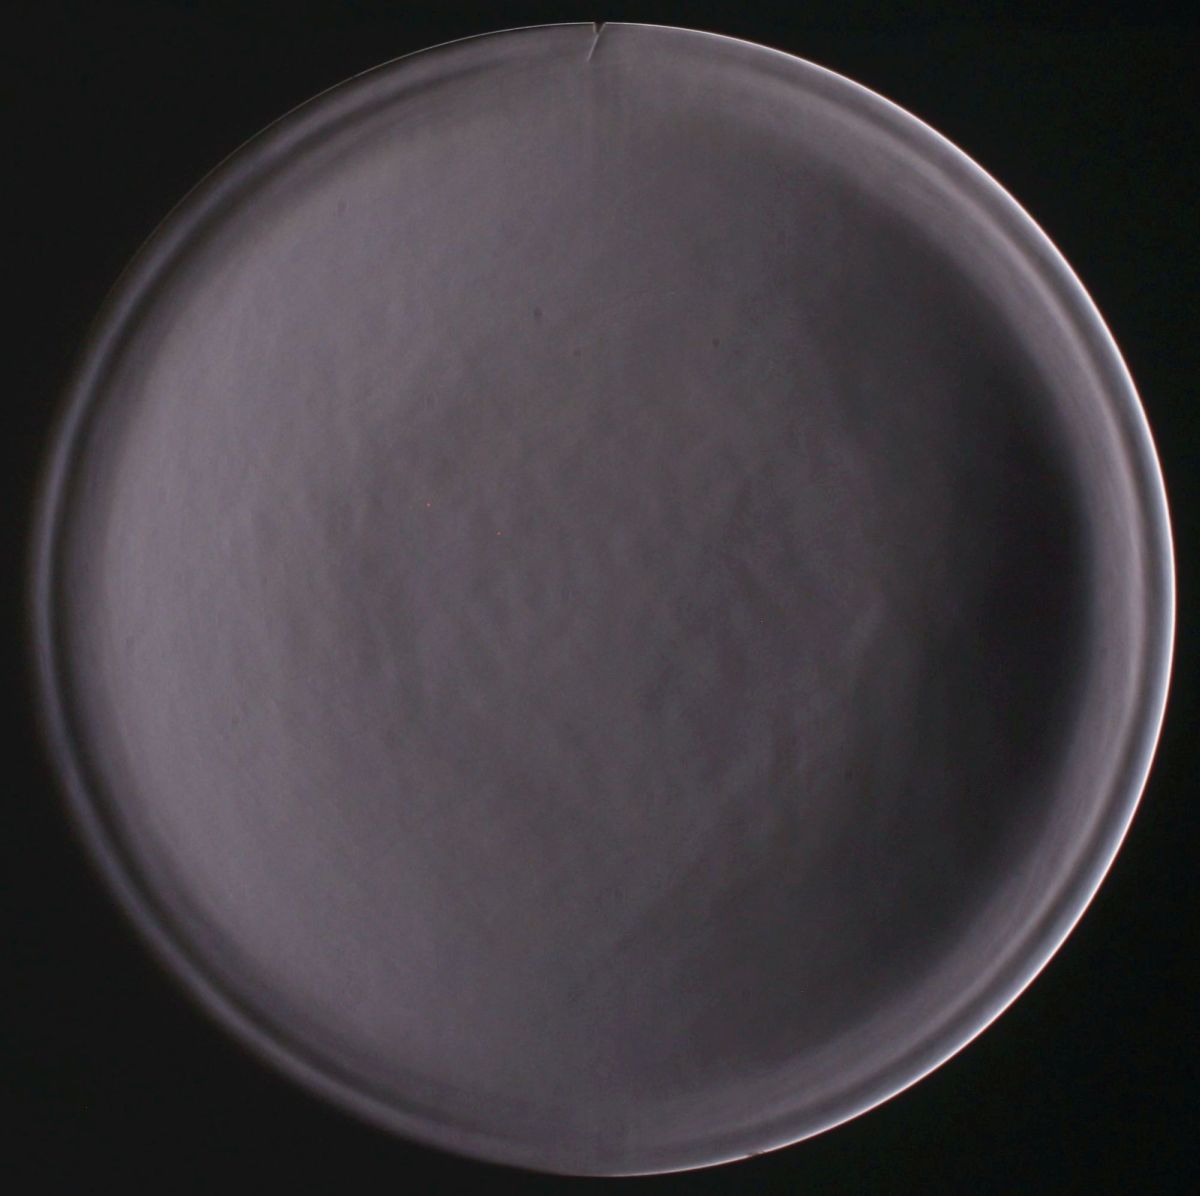
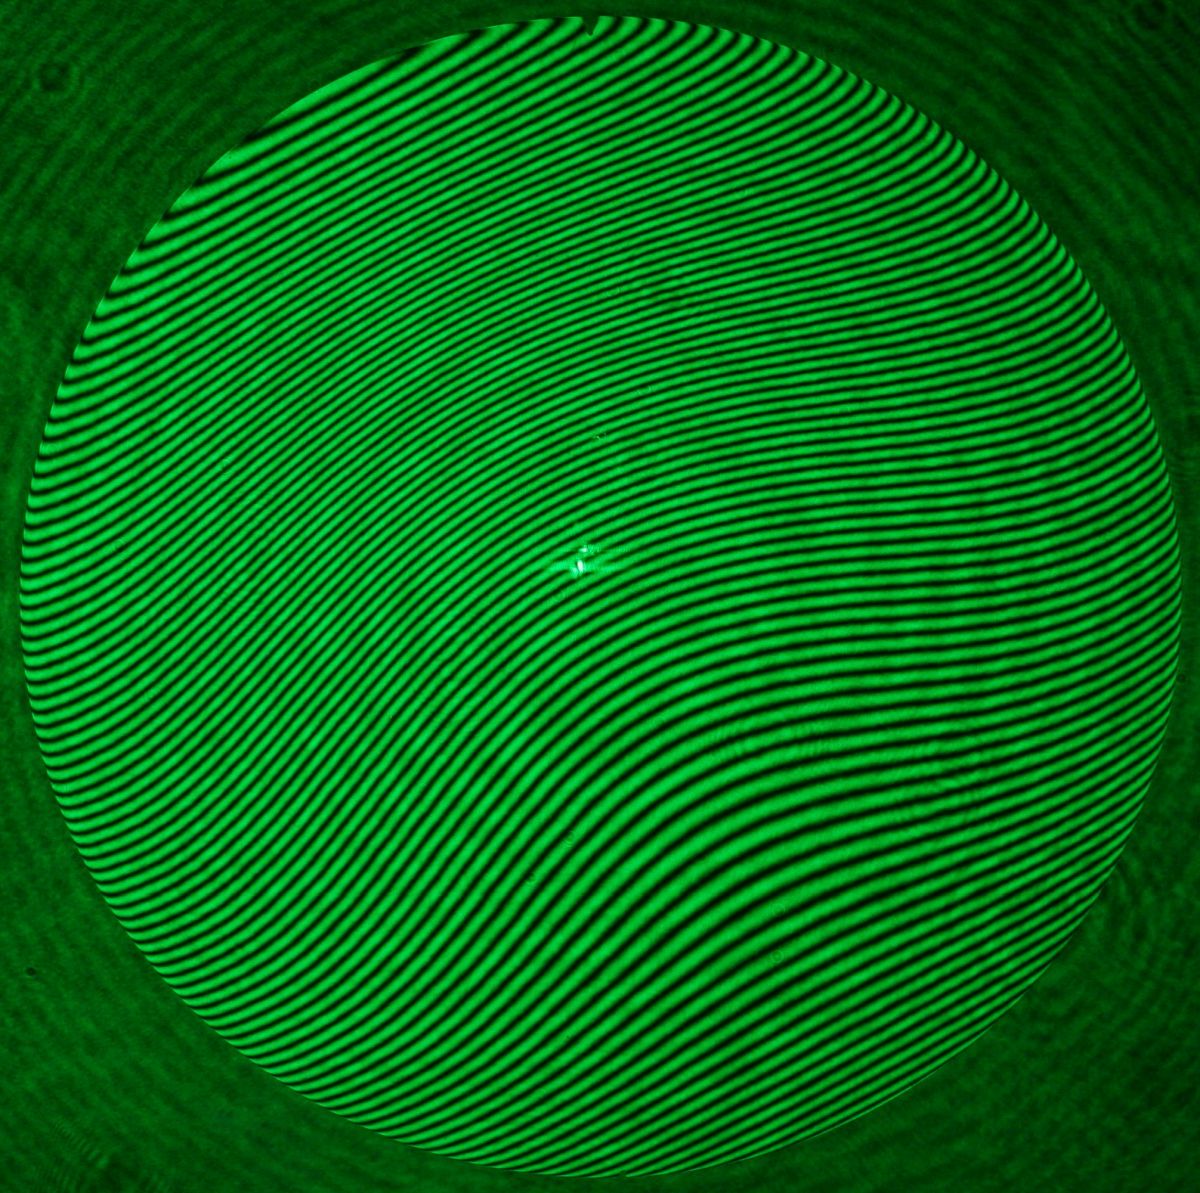
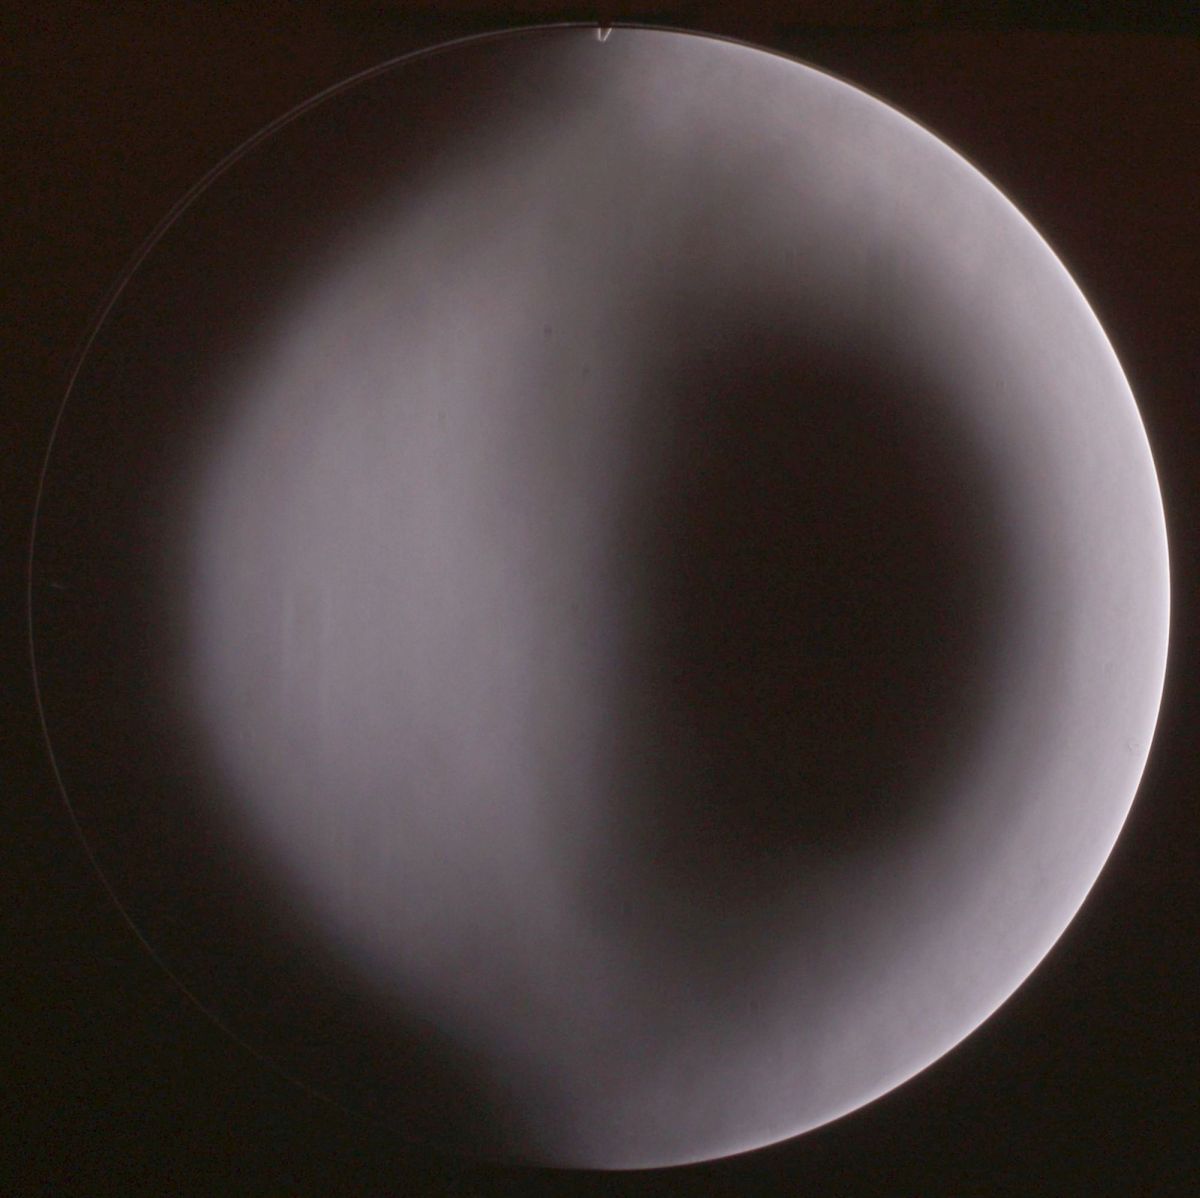
The problematic 505 mm f/5 mirror at Foucault test at the center of curvature with the knife edge coming from the left. It shows a fairly spherical surface, but the outer ~ 25 mm have a far too long ROC. The interferometer measurement reveals a low edge of more than 1 micron (~ 2 waves):
This is so severe, that it would take excessively long time, to get the whole area down to the edge level. It is much more effective, to selectively polish the area just inside the edge and get a new average ROC, which is between that of the middle and that of the edge. |
|
|
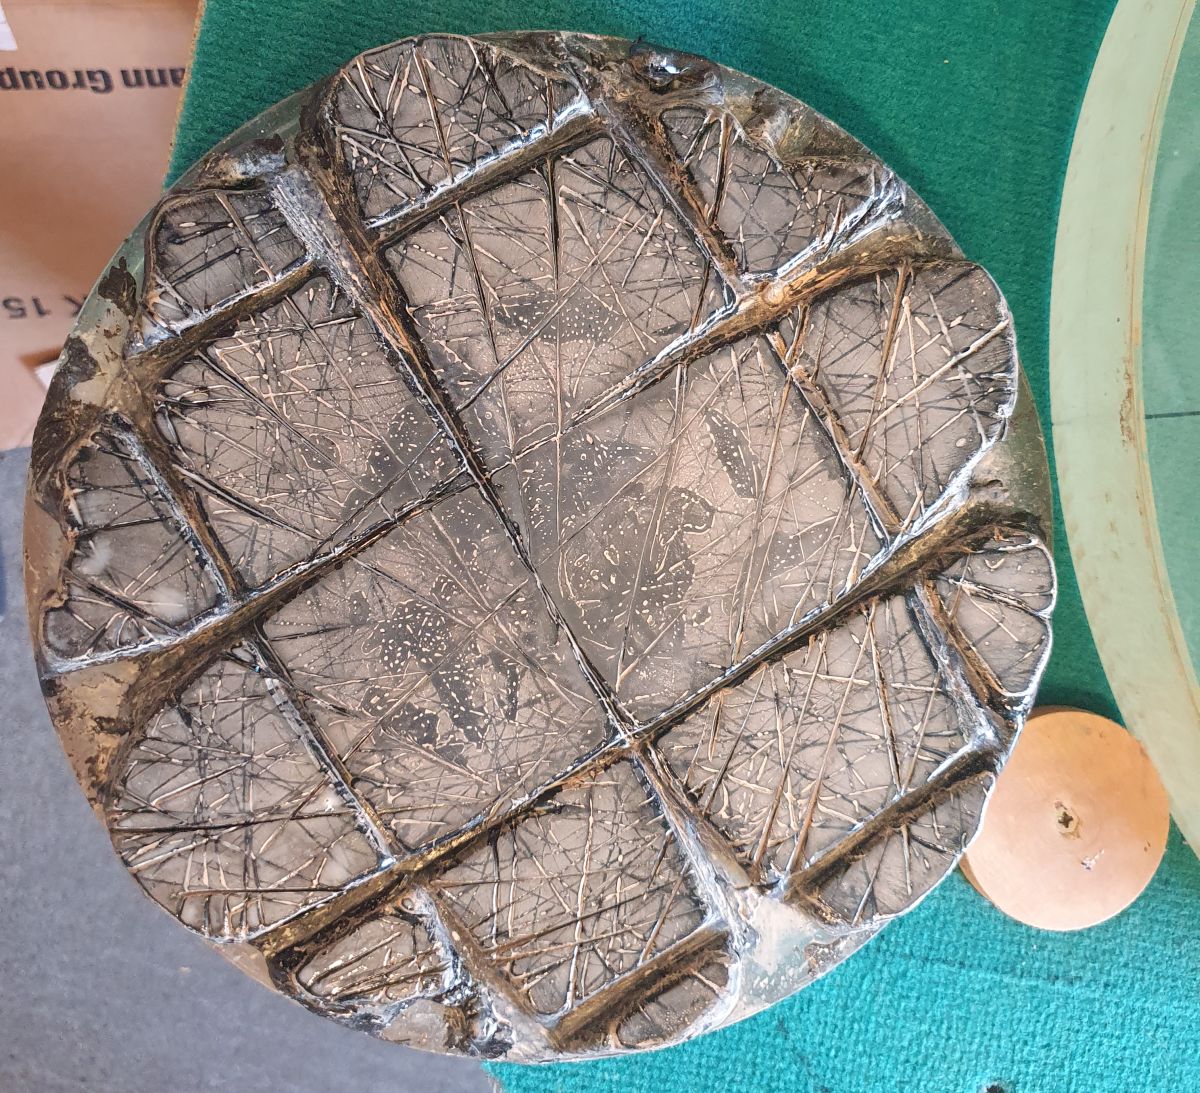
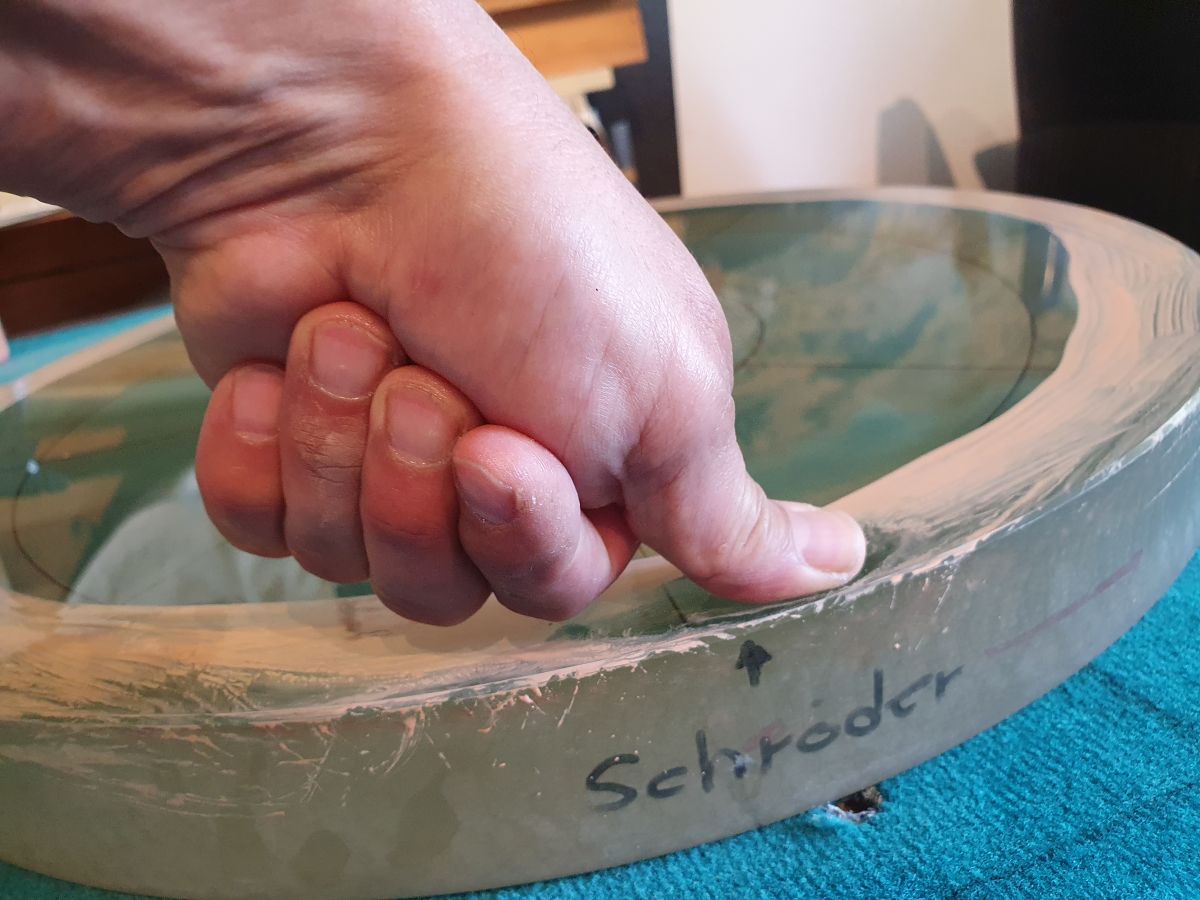
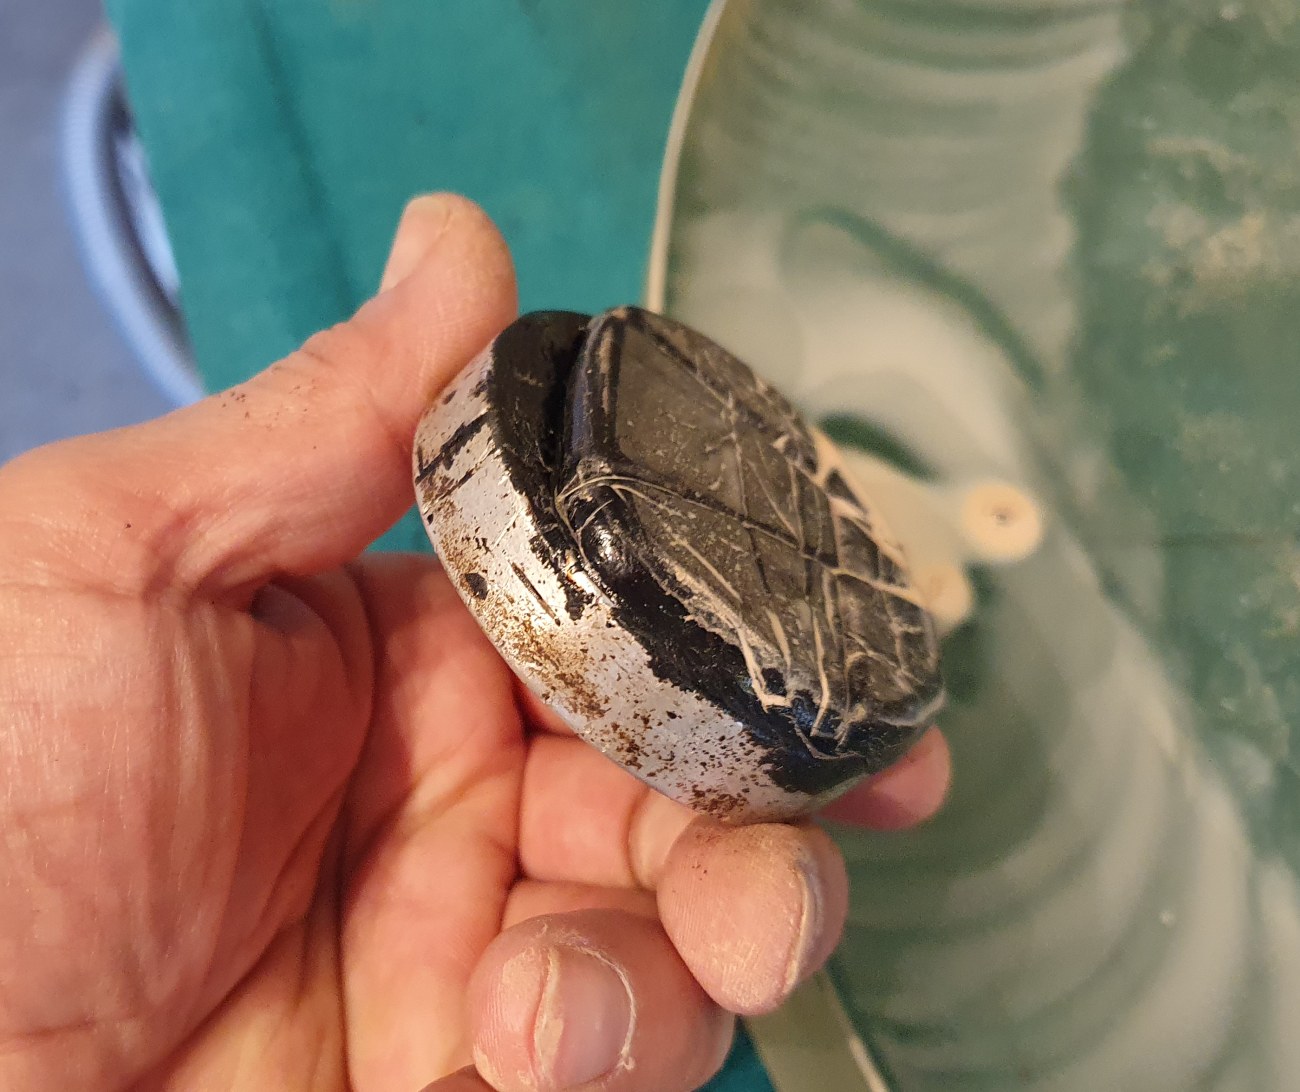
Concentrated polishing with the thumb just inside the edge. Do not run above the chamfer itself, as you will round it up. Keep the polishing compound always wet with a flower sprayer, to prevent it from drying out on the glass. With the index finger you can get even closer to the very edge (see Video 2MB). |
|
|
This treatment is to be applied until the very edge does not focus at longer ROC, than that of the newly generated zone just inside of it (at the right side of the Foucault image the extreme outer area glows no brighter than the zone more inside of it). The procedure generates an ugly looking "canyon", but is not as bad, as it looks like. |
|
|
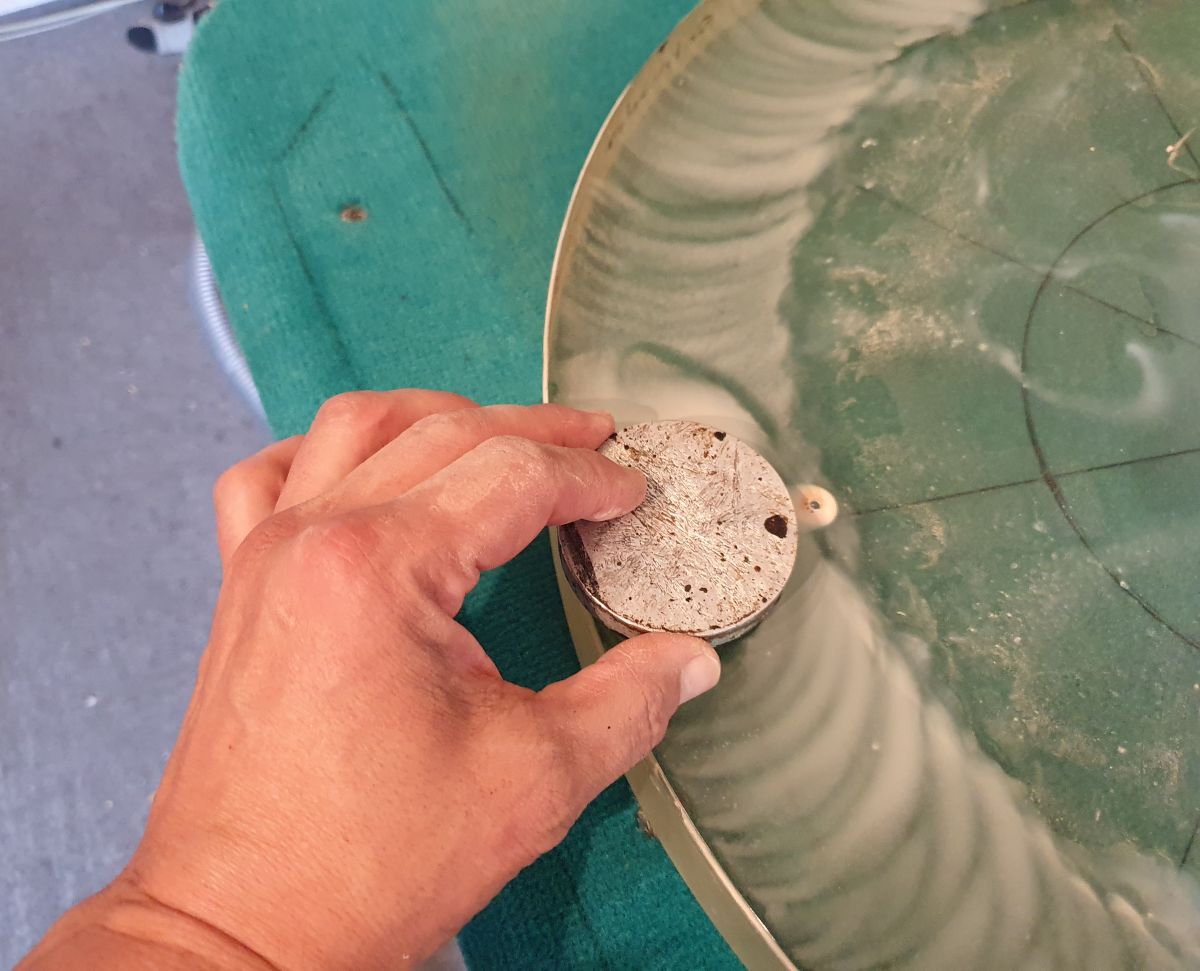
Subsequently smoothen out the canyon with a small polishing tool, which is larger than the thumb, with circular movements. I cut away the pitch at one edge of the minitool, to maximize the action at the very edge. Again run along the edge as near as you can without touching too much the edge itself (see Video 2MB). |
|
|
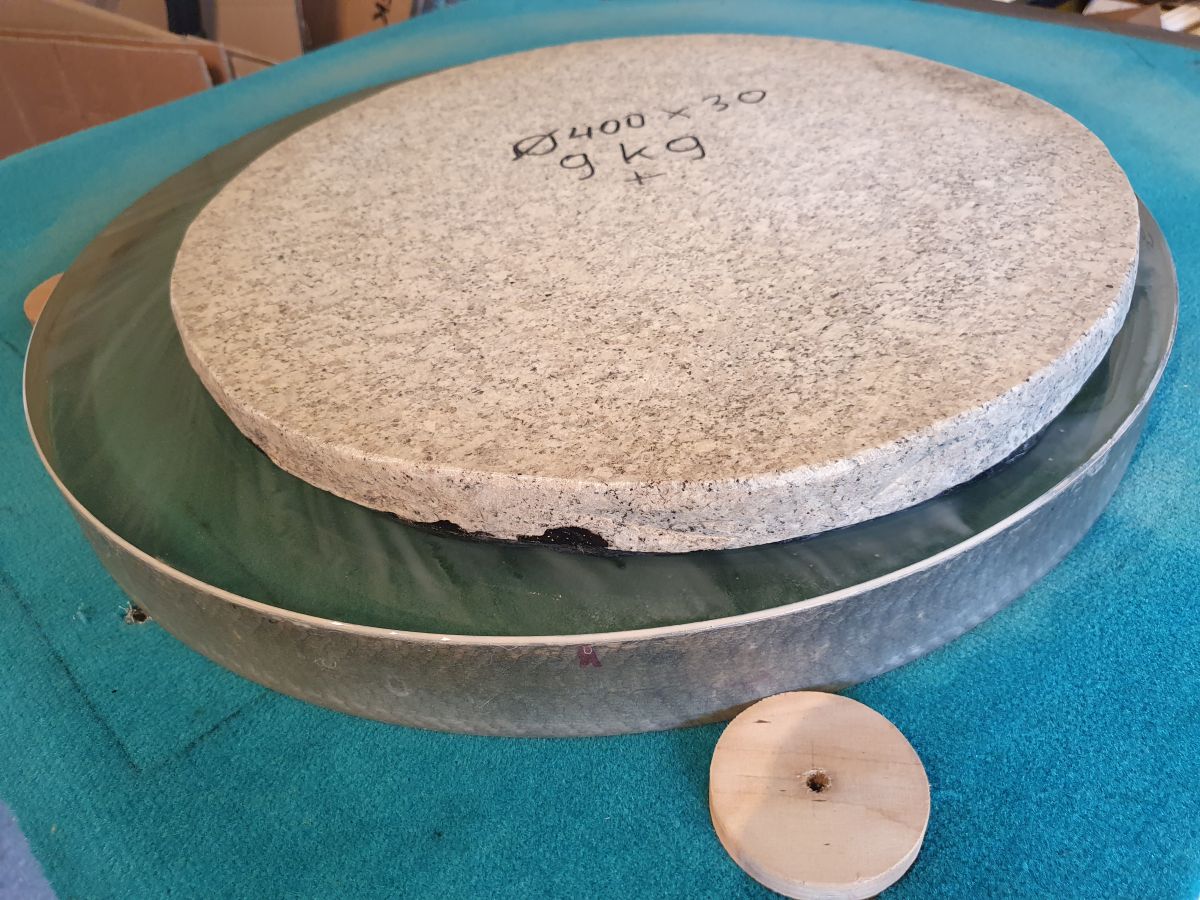
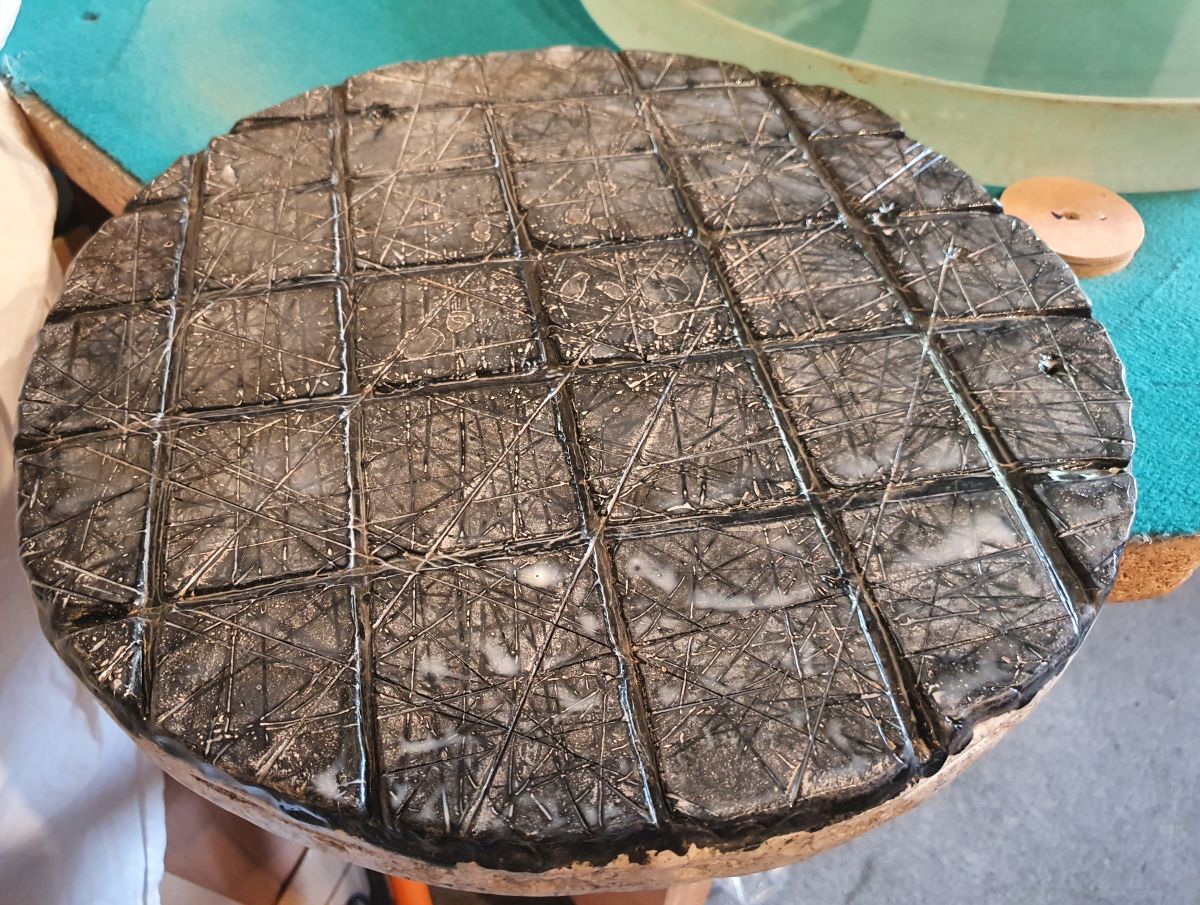
This produces a new wider zone, which is much shallower than that before. It this case here I even overcompensated it, which is not harmful at all - it even helps in the further course, to keep the edge from getting too low again. At this stage the mirror can be smoothed out with a large 40 cm polishing tool working Tool on Top (TOT). It is essential, that the pitch lap makes good contact all over (channels in the middle not narrower as at the edge) and that you find the "neutral stoke" which polishes the edge no less than the middle, to avoid leaving the edge behind again (see video of polishing a 60 cm meniscus mirror with a 40 cm Tool (18MB). |
 |
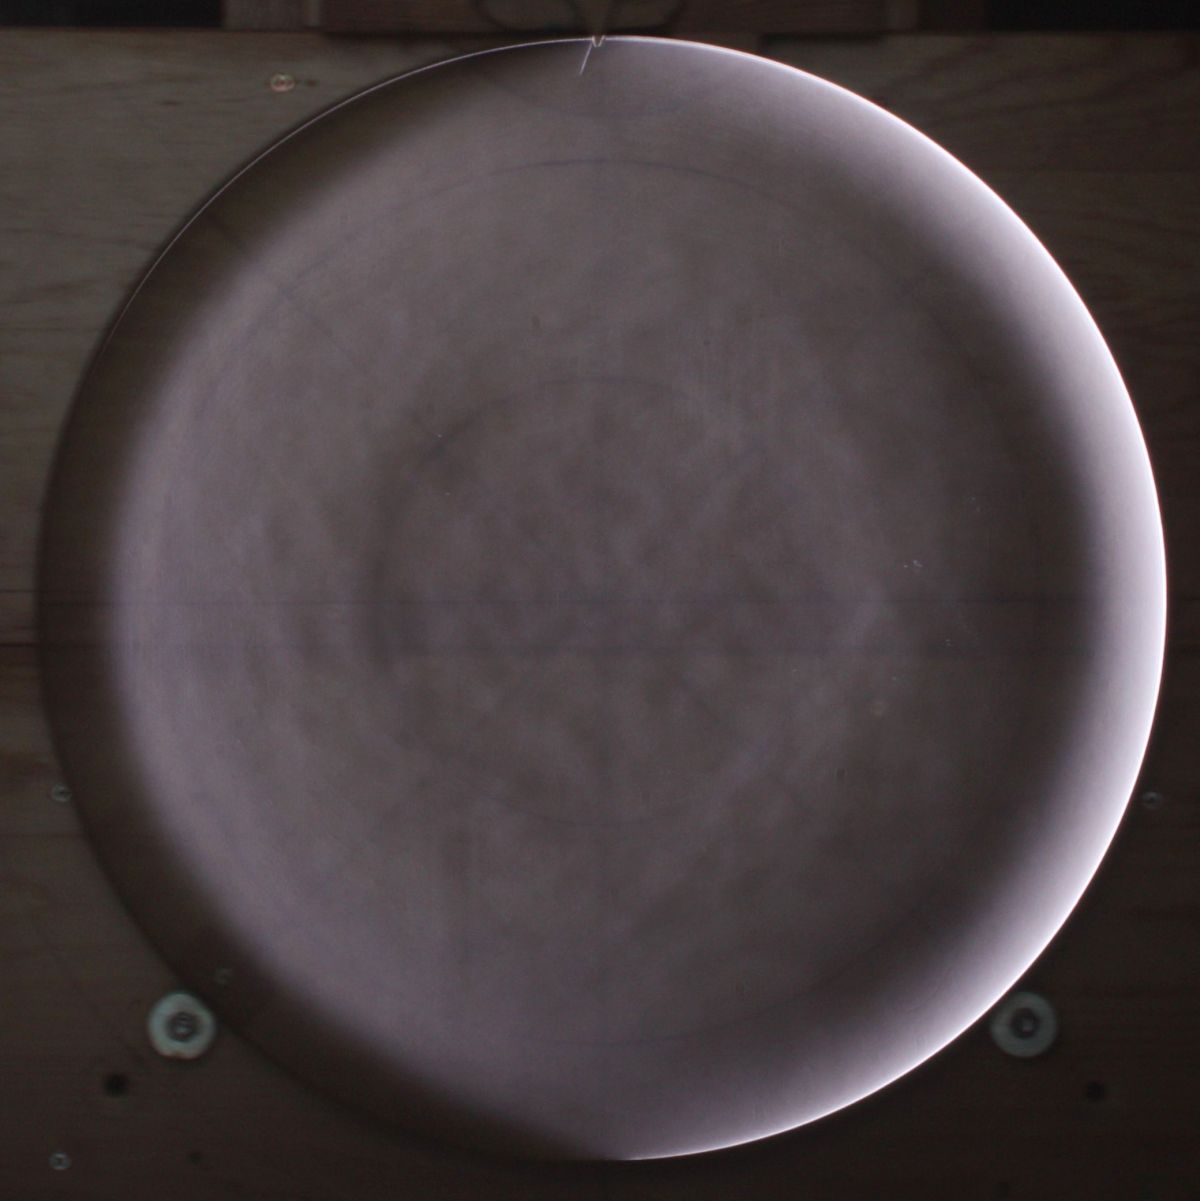
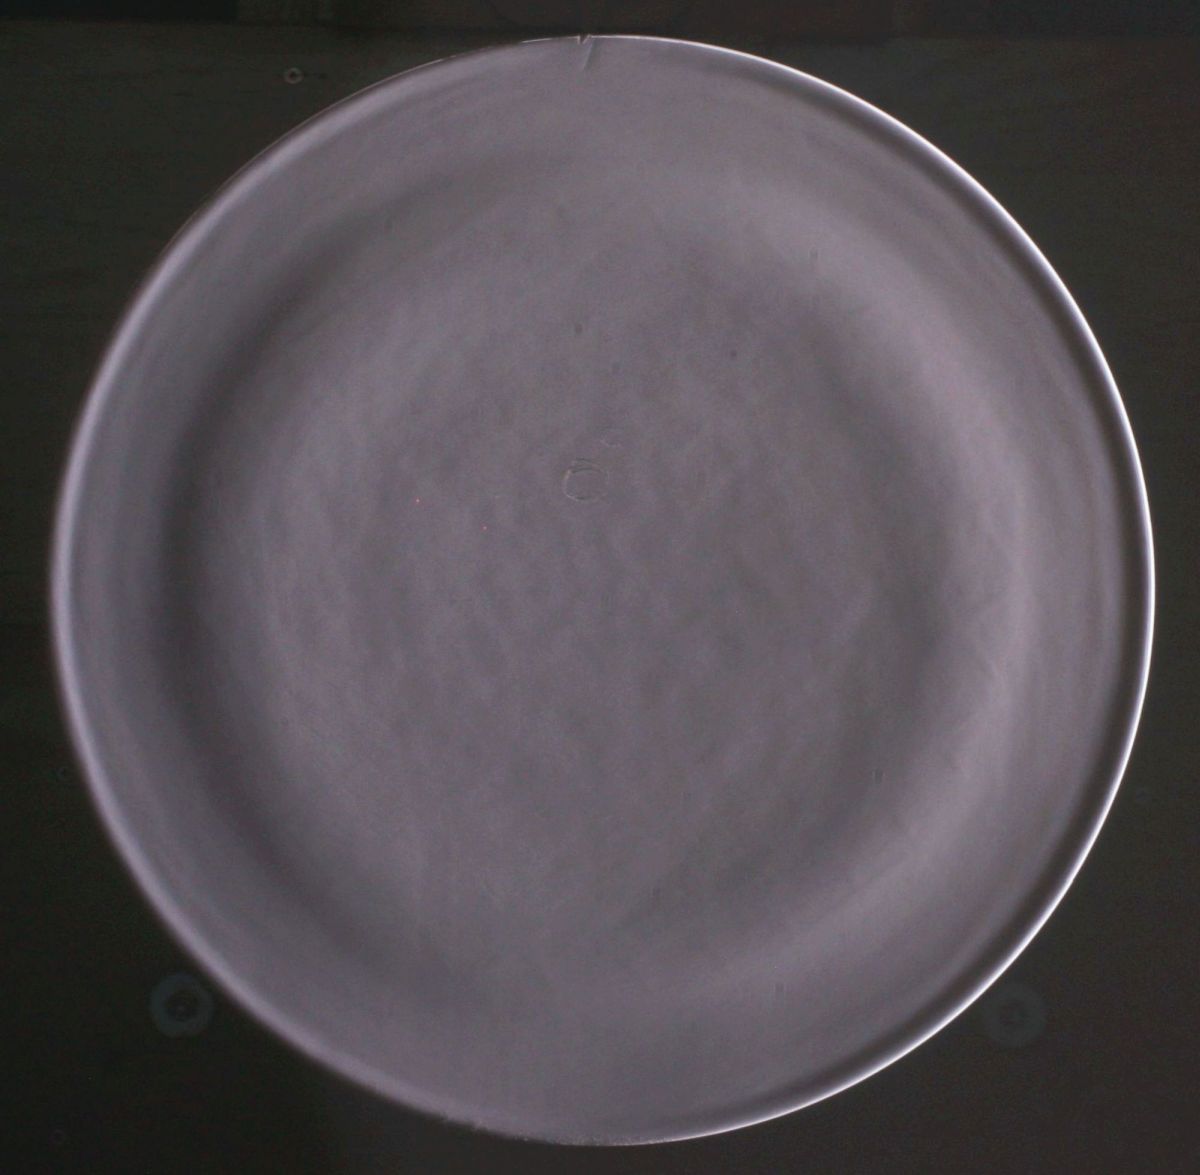
After polishing with the large pitch lap all zones and bumps disappeared completely. In this case the Foucault image shows a weak parabola shadowing already with a smooth appearance all over and a sharp edge. The ruler test demonstrates, that the mirror edge glows only slightly brighter and is almost dimensionless like the diffraction glow of the ruler. This is a hard test for a really sharp edge. More on the Foucault ruler test see images of Alois in the German forum Astrotreff.
This is a perfect starting point for further parabolizing |
 |
For parabolizing "Tool On Top" I use subdiameter star tools with 35-50% of the mirror diameter with small channels in the middle, which get subsequently wider towards the edge. So, the pitch lap polishes strongly in the middle and continuously weaker towards the tool edge. Stokes mainly center over center dig out the middle effectively, wider V- and W- strokes push the correction more towards the outer area. By varying the strokes one can develop the parabola smoothly avoiding zones almost completely. This is particularly helpful at large fast mirrors. So, mini tools, which tend to produce slightly rougher surfaces, are needed at most for fine tuning at the last stages of figuring only. |
 |
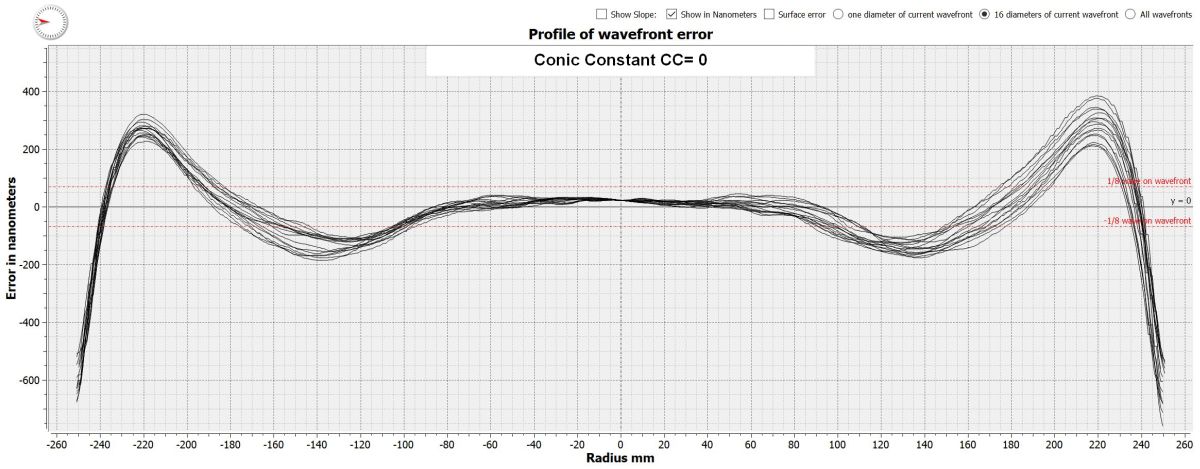
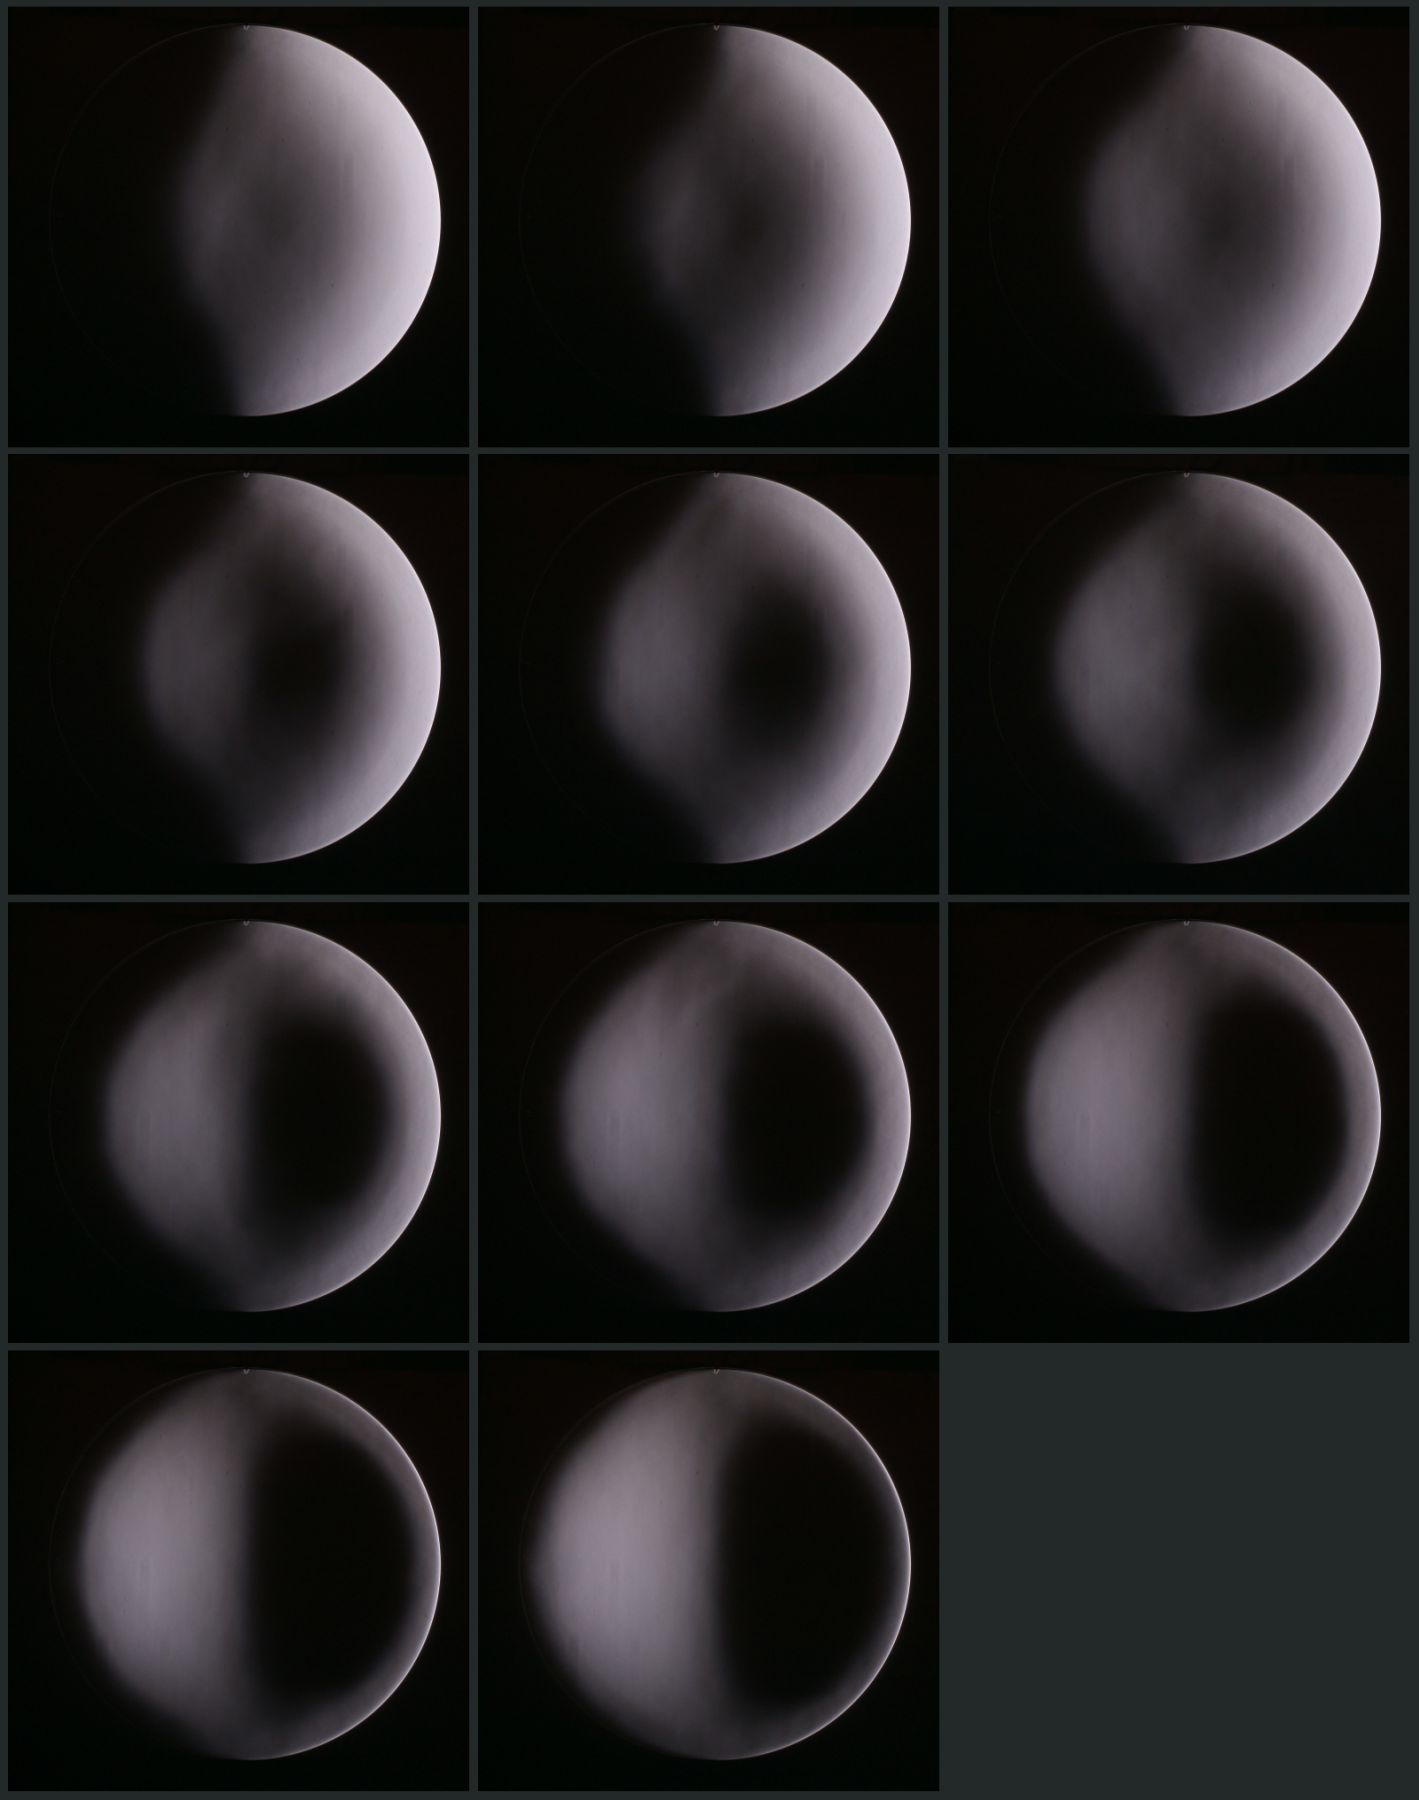
Final result out of approx. 40 interferograms in 4 mirror orientations, each rotated back and averaged with the genius analysing software DFT- Fringe. This cancels out the mirror bending effects in the test stand and the astigmatism of the Bath- Interferometer and middles out the air turbulences of the test room as well. So, the real form of the mirror can be extracted very precisely. The Foucault test shows a smooth parabola up to the extreme edge as well (see Foucault at 70% Zone and Foucault series). |
At large very fast mirrors the opposite error can ocour: A too high edge. In other words, the steep parabola is not developed up to the very edge, the edge remains undercorrected. How to correct this error with an "edge slicer", see Hohen Rand Korrigieren im Astrotreff (German text).
Home | Imprint | Privacy Policy | About |