| Home | Material | My Telescopes | Mirror Making | Deep Sky | ext. Links |
| Tipps and Tricks | Typische Fehler | Foucault Tester | Interferometer | ITV Workshop | Selbstbau München | Teleskope München | Mythen | Links Mirror Making |
Tips and tricks for mirror making
Copyright © Stathis Kafalis, all rights reserved
| Tool | Rough Grinding | Fine Grinding | Polishing | Parabolizing | Pfeiltiefe Messen | Bilder zum Schleifen | Pechhaut Herstellung |
Tool:
For grinding and polishing the mirror, a counterpart is required, generally called grinding tool. It must be thick and stable enough to maintain its shape, water-resistant, and must not crumble or scratch the mirror during fine grinding and polishing. The following types have proven effective:
- A glass tool of sufficient thickness. This can be used for coarse grinding, fine grinding, and polishing. For 6 to 10-inch mirrors, it usually has the same diameter as the mirror; for 12-inch and larger mirrors, smaller tools (60-100% of the mirror diameter) are often used for cost reasons. These so-called "subdiameter tools" work just as well, but require an adjusted operating technique.
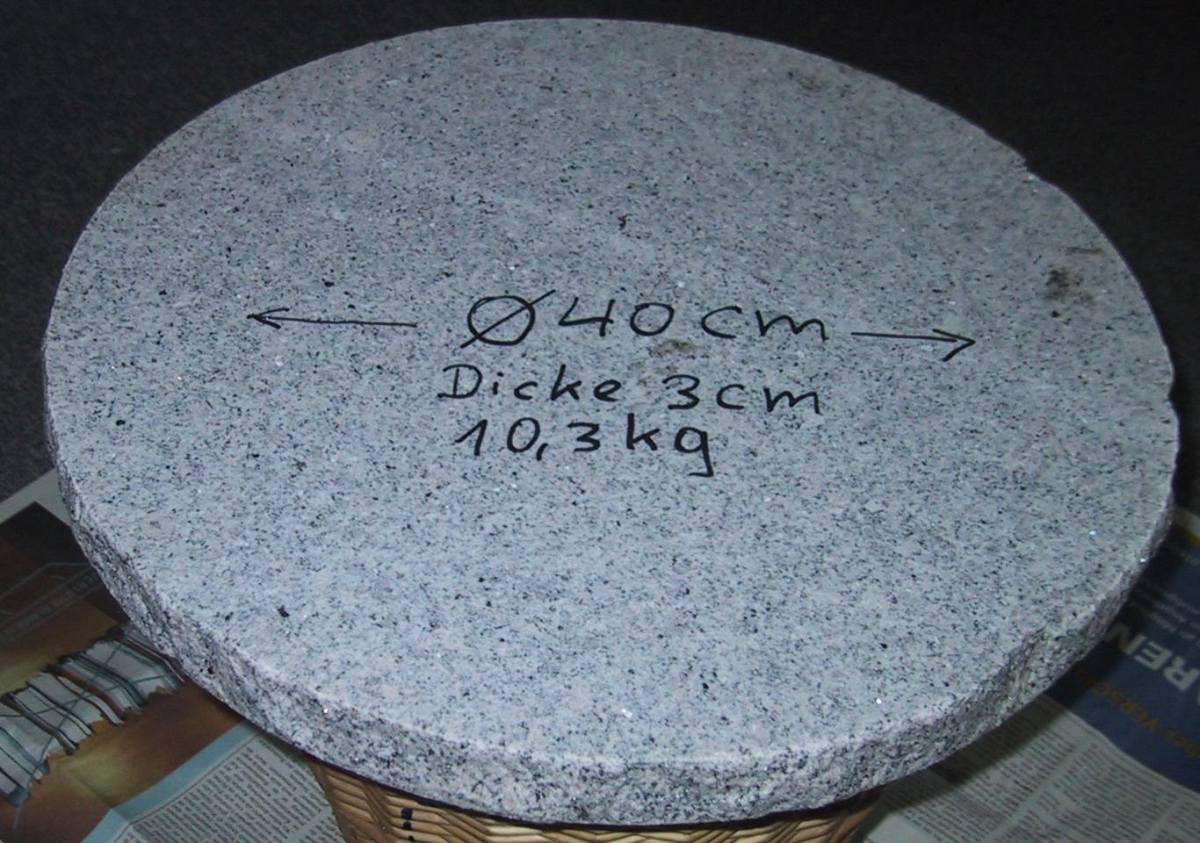
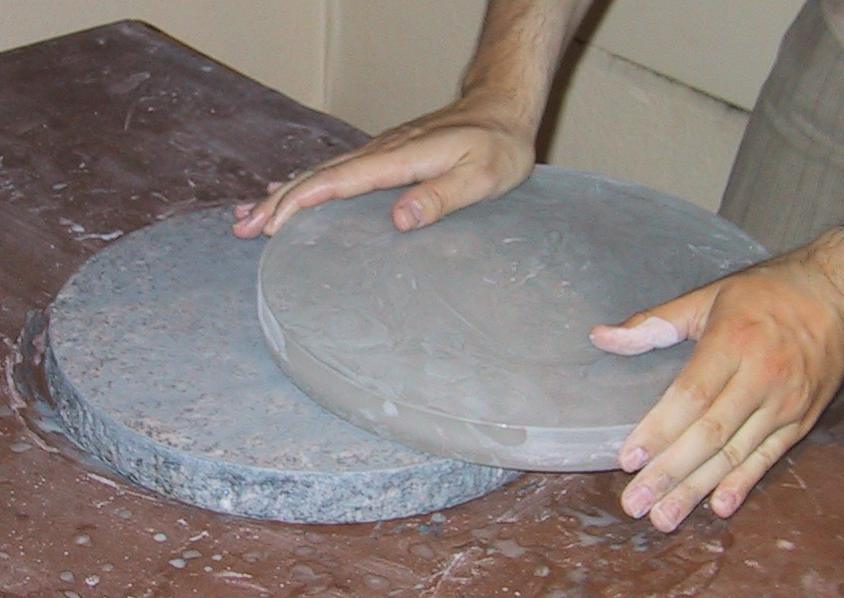
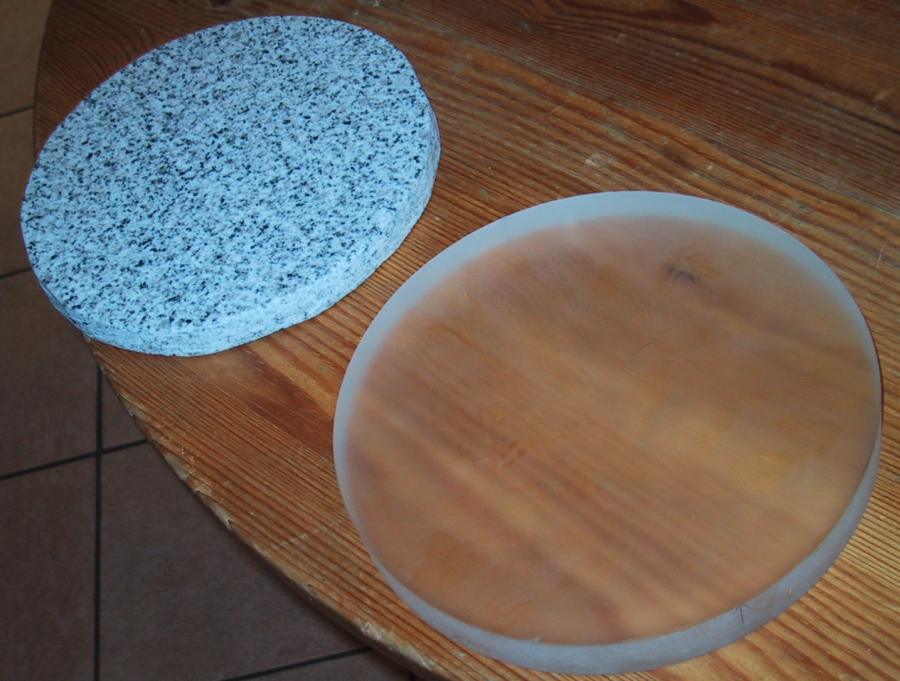
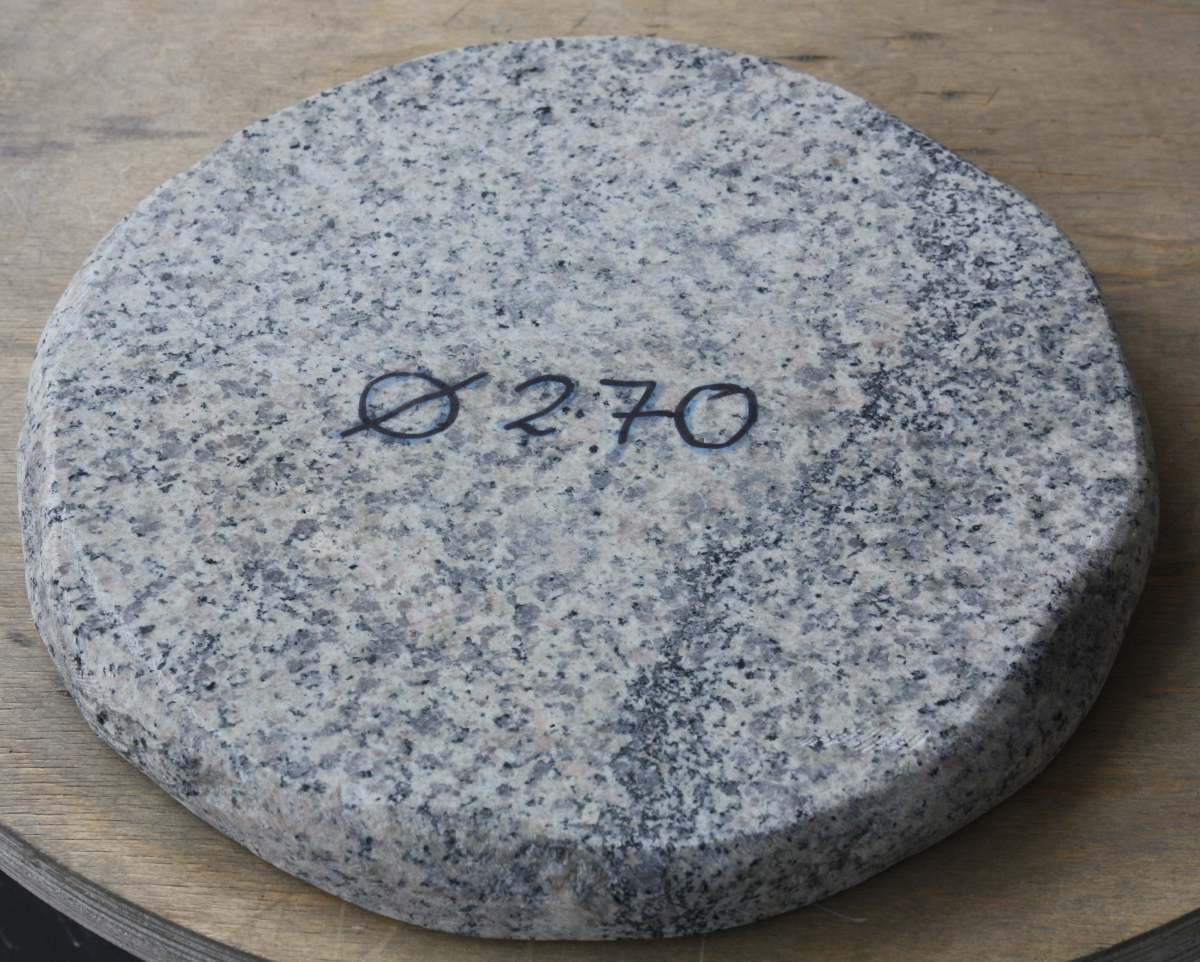
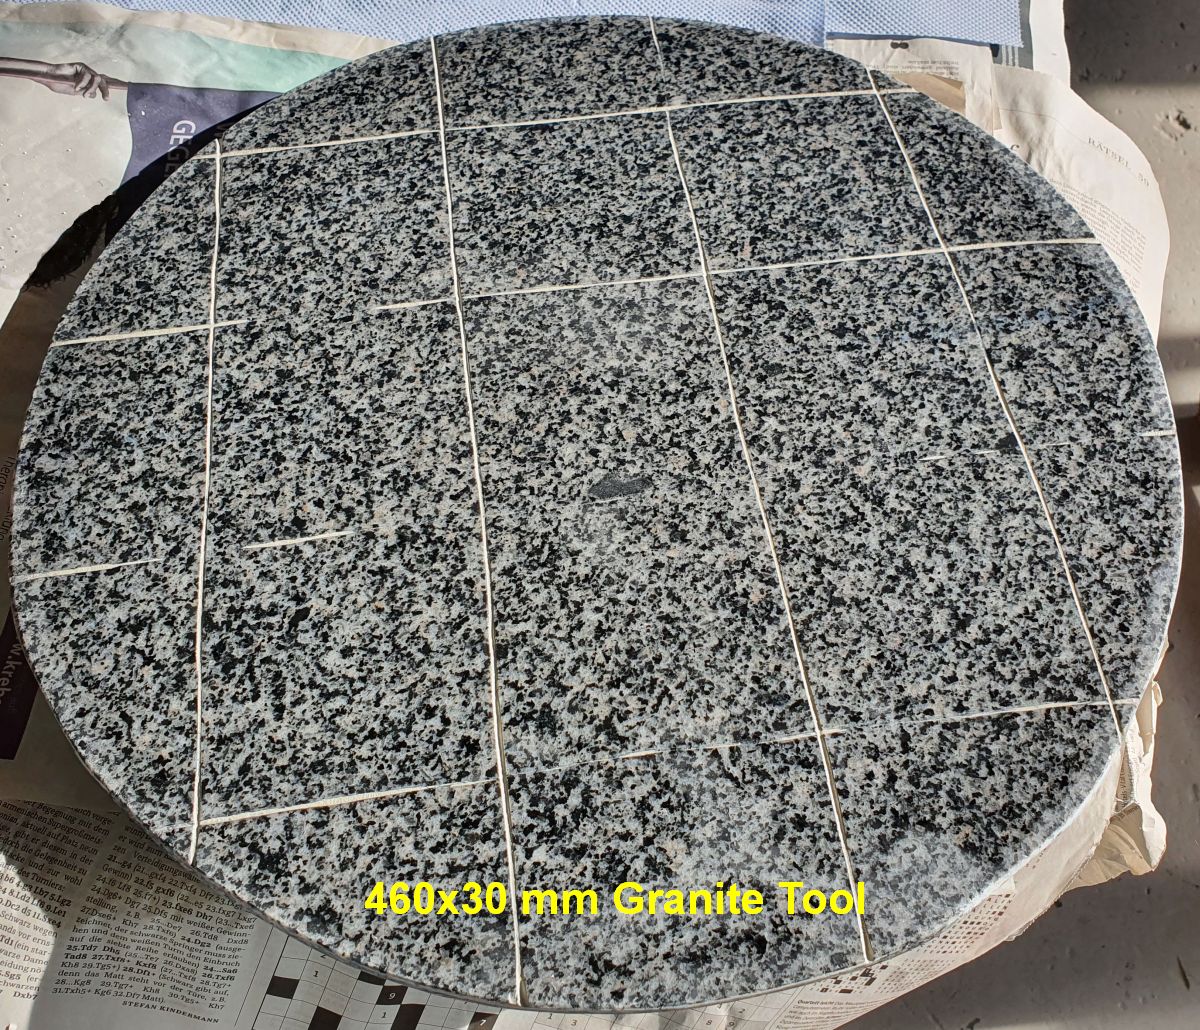
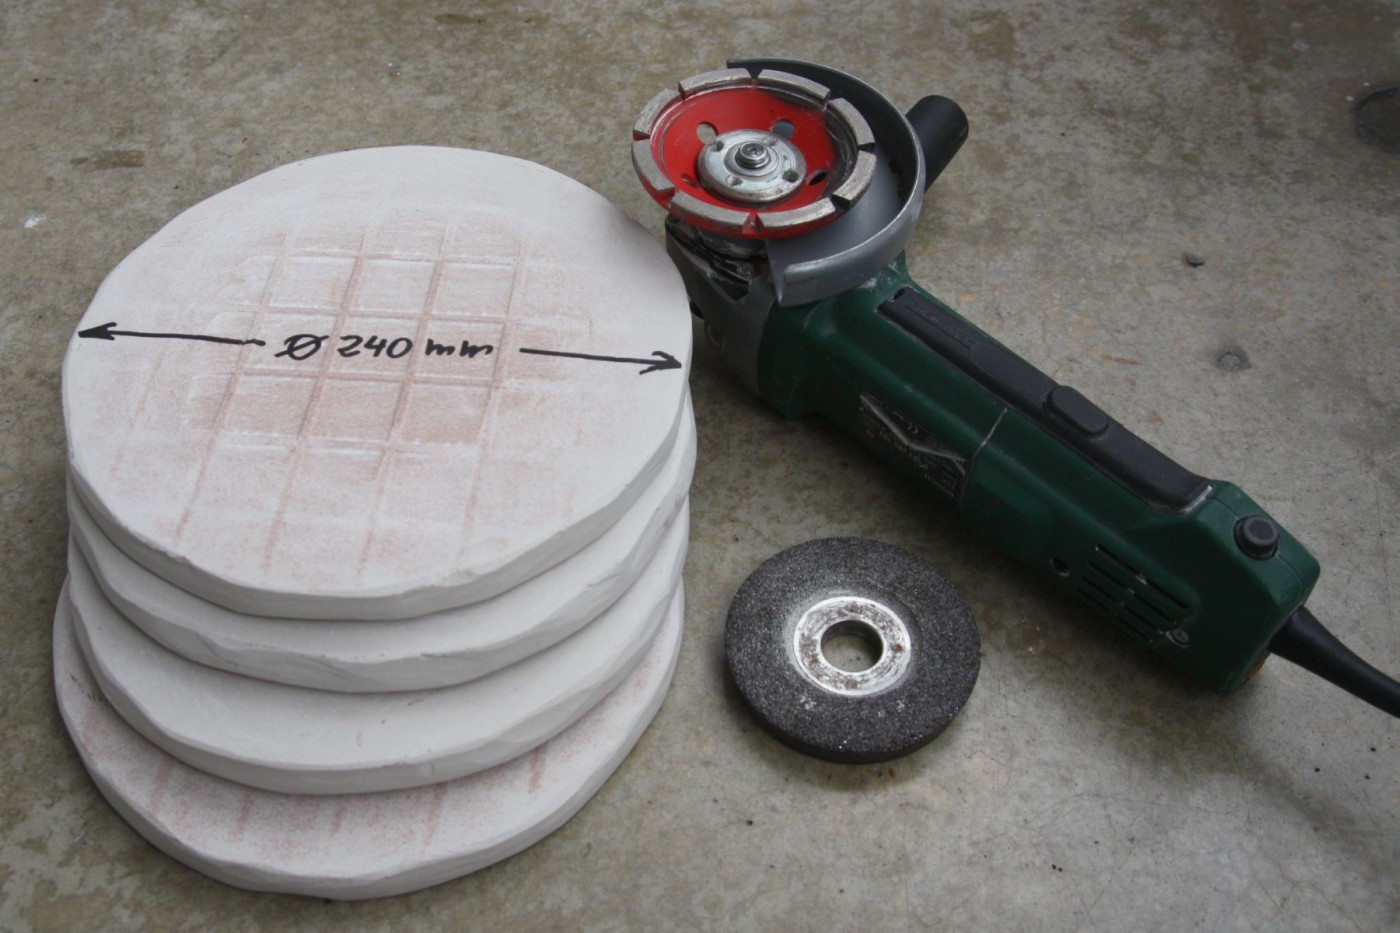
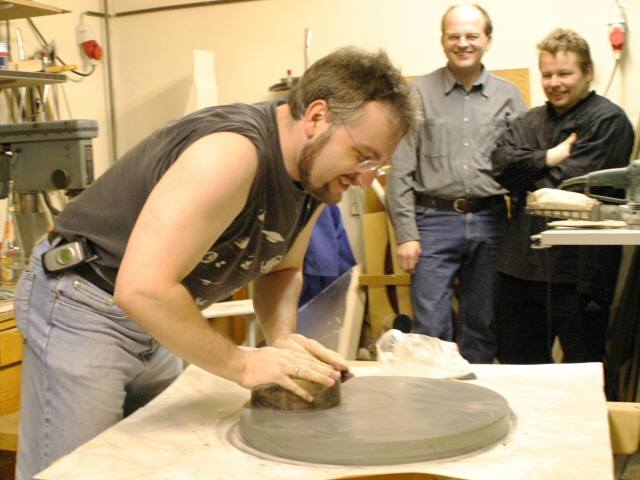
- Granite tool. Works just as well as a glass one for coarse grinding, fine grinding, and polishing, so you only need one tool for all stages. They are often available in hardware stores already round, in 30 or 40 cm diameter and 3 cm thickness, as "paving slabs" or "stepping stones." See 30 cm coarse grinding on Granite Tool. You can cut them to the appropriate diameter with an angle grinder, or have them cut by a stonemason. See 20 cm mirror with 20 cm Granite Tool. Kurt shows how to cut them to size (observe safety precautions!). Of course, it also works without a rotating disc; it doesn't have to be perfectly round. This 27x3 cm Granite Tool works just as well. For larger tools, you can grind grooves into them to prevent suction or aquaplaning (see 46x3 cm Granite Tool). Hoging out the mirror is made easier if you roughly pre-grind the front of the tool into a convex shape with an angle grinder. This makes the center of the mirror more effectively hollowed out.
- Grinding disc made from porcelain stoneware tile. Instead of granite, the tool can also be cut from a large and sufficiently thick porcelain stoneware tile (see 24x2 cm porcelain stoneware tool ). Porcelain stoneware is more homogeneous and does not crumble.
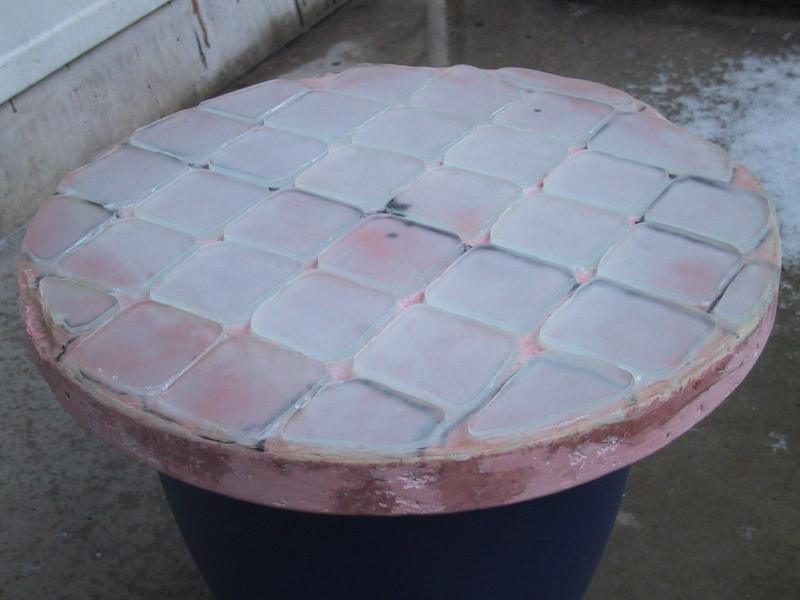
- Tile/epoxy sandwich: Several thin porcelain tiles are rounded off with a grinder and glued together with epoxy to achieve the required overall thickness. The thickness of the top layer must be greater than the sagitta of the mirrror. See example .
- Plaster/tile tool made from super-hard industrial plaster or dental plaster and ceramic or porcelain tiles. Waterproof plaster is essential, as the tool will get wet. Ordinary construction plaster is unsuitable. See, for example, the instructions for making the 45 cm industrial plaster/ceramic tile tool for my 24-inch monitor, or the instructions by Berthold Hamburger. For making it without epoxy, see the instructions by Richard Schwartz: Word file. Instead of ceramic tiles, you can also use glass tiles, which you can cut from a glass sheet using a glass cutter. See the 35 cm dental plaster/glass tile tool. This is well-suited for preground or premilled blanks.
- Tile adhesive/tile tool: Instead of expensive dental plaster, you can also use tile adhesive or concrete. However, the tool must be very well sealed with epoxy or similar, as tile adhesive and concrete contains sand that can crumble onto the mirror during fine grinding. Achim Strnad makes his tile tools as a sandwich of two large porcelain tiles with tile adhesive. Here are his instructions.
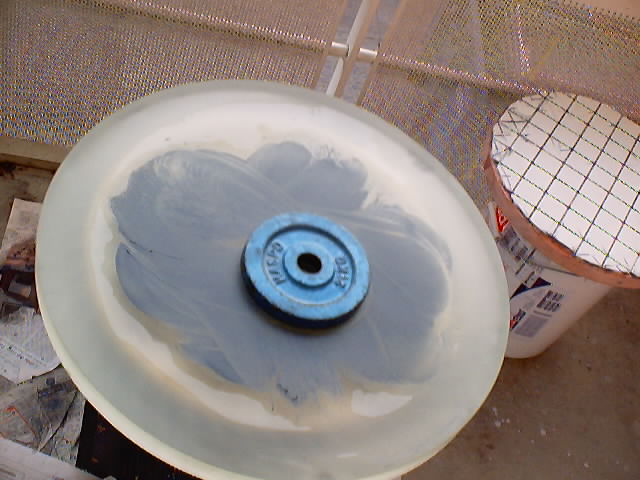
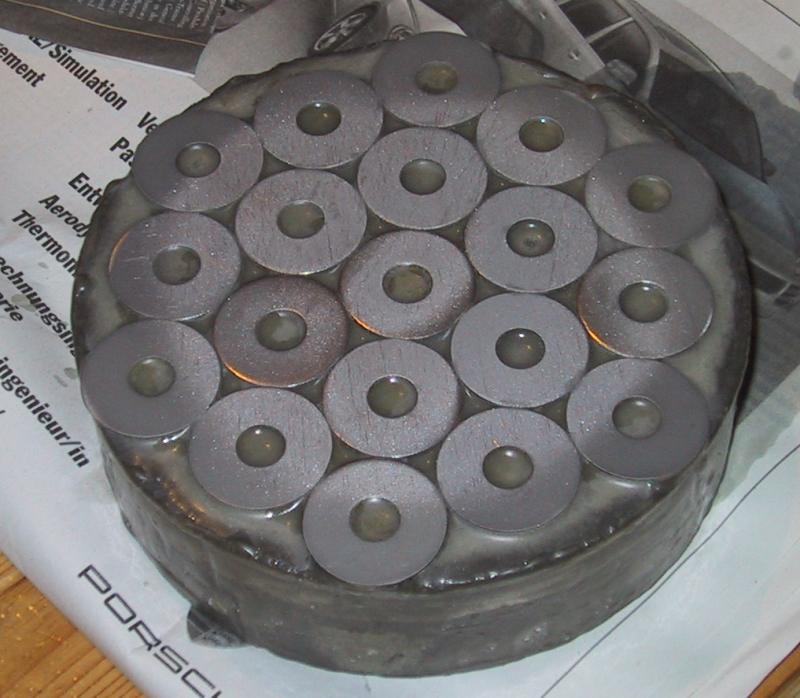
- For hollowing out only: Steel flange, barbell weight, brass block (image by Martin Dietzel), pre-curved tool with epoxy-bonded steel washers or similar, approximately 25-35% of the mirror diameter. Method: Tool on Top (TOT) and apply strong pressure to the center. After hollowing out, you can continue with a convex fitting tool.
Rough Grinding:
The first step involves using coarse silicon carbide, or simply "grit" (grain size #80, #60 for larger mirrors), to create the necessary depression in the blank. The sagitta t (depression in the center) is calculated as: t = ROC - √(ROC² - 1/4 * D² ) where ROC = radius of curvature = 2 * focal length and D = mirror diameter.
Example: A mirror with a diameter of D=250 mm and an aperture ratio of f/5 has a focal length of f=1250 mm and therefore a radius of curvature of ROC=2500 mm. The sagitta is calculated as t=3.13 mm.
Details on determining and measuring the sagitta using calipers or a lamp test can be found here.
Images of rough and fine grinding are available here.
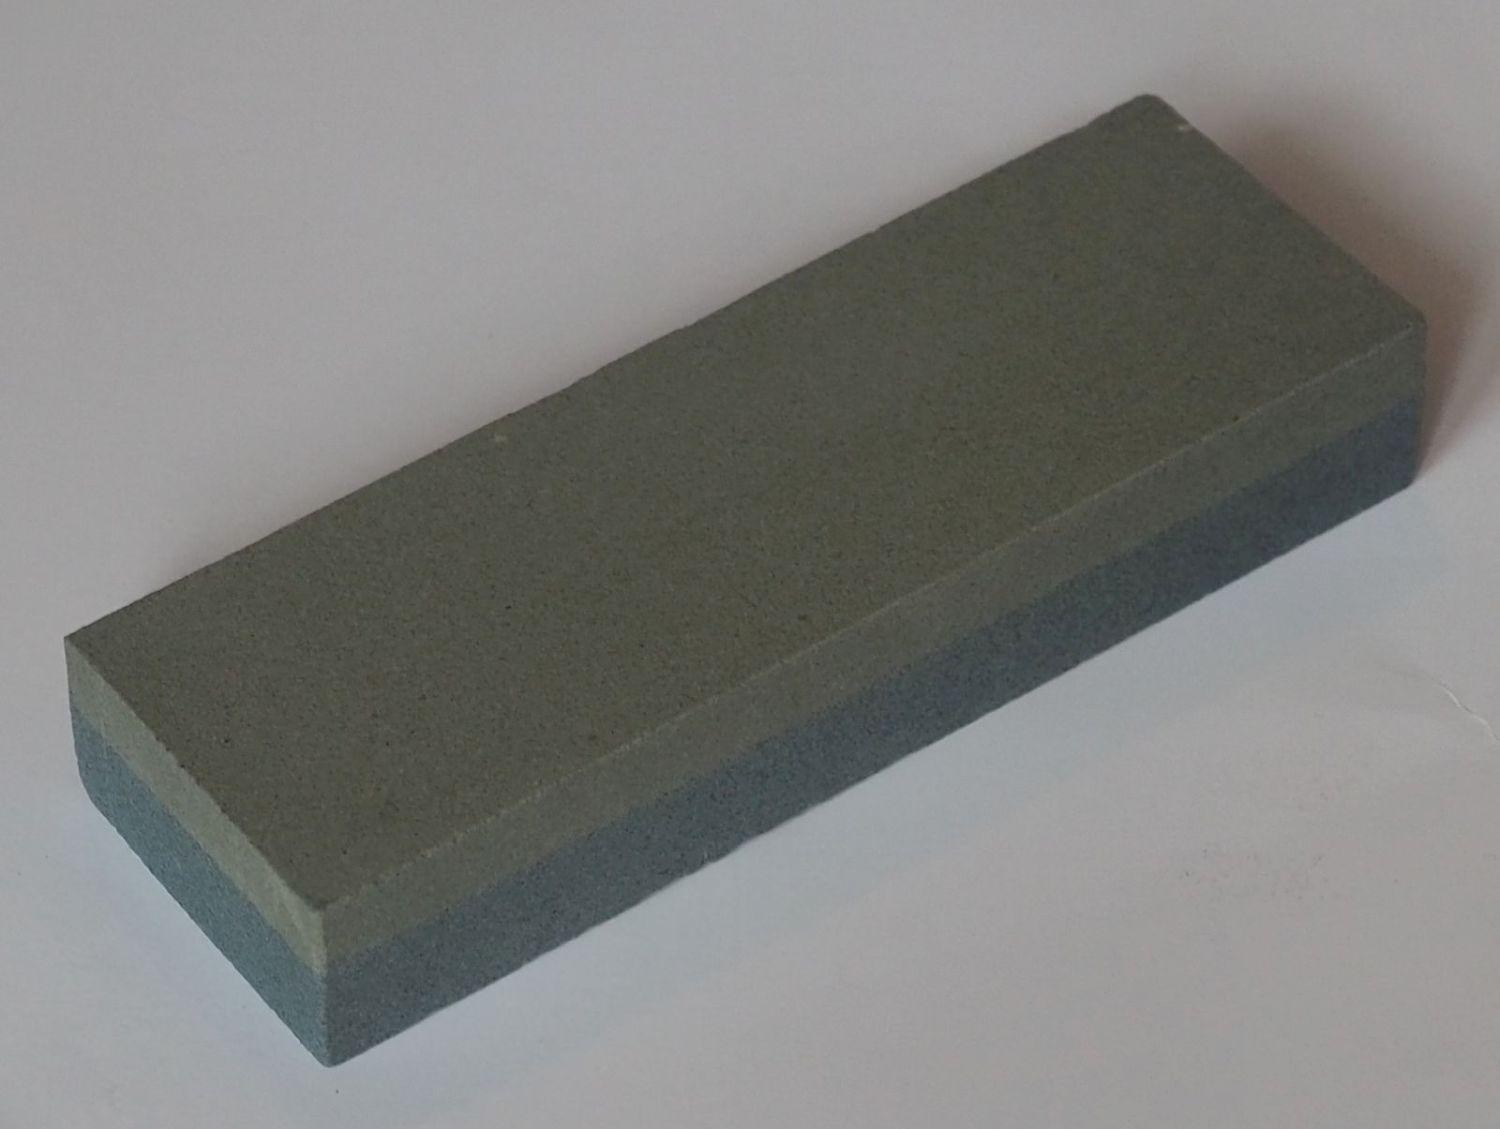
- Preparation: Bevel the mirror with a whetstone; otherwise, the edges will chip during grinding. A 1-2 mm bevel is o.k.
- Stroke technique: Mirror on Top (MOT), using the longest possible stroke with the largest possible lateral overhang. Instead of strokes, sweeping circular or oval movements are even more effective, as the mirror remains in constant motion (less "stop and go").
- Method of operation: Fast grinding with sufficient pressure, but in such a way, that the mirror does not tip over (risk of glass breakage).
- Consistency: A mushy slurry of carbide and water. Too much water will squeeze out the powder, wasting it. Don't apply too much abrasive. About 1/3 teaspoon is sufficient for an 8-inch mirror. When in doubt, use less rather than too much.
- Reloading: Wipe off the grinding slurry (e.g., with a sponge cloth) and add new powder as soon as the noise subsides. It should grind loudly! Prolonged grinding of the used carbide is a waste of time.
- Create a spherical shape: Just before reaching the desired depth, continue grinding with less overhang. If the final depth has already been reached or even exceeded, turn the disc over and, with the tool on top (TOT), make mirror and tool matching using mainly 1/3 strokes to achieve the desired spherical shape. At the end of the rough grinding, the curvature should extend almost to the outermost edge (hold a ruler across it). A 1-3 mm edge may remain unworked. This small rest can be finished with the next grit. This also prevents larger fractures caused by the coarse K80 grit.
- Bevel: To prevent cracks at the edge, a bevel must be ground into the emerging mirror. A grindstone (such as a "scythe stone") is suitable for this. Regrind the edge as needed towards the end of the rough grinding process. When transitioning to the fine grinding, also grind a bevel into the tool itself, as otherwise, scratches from breaking glass fragments are likely.
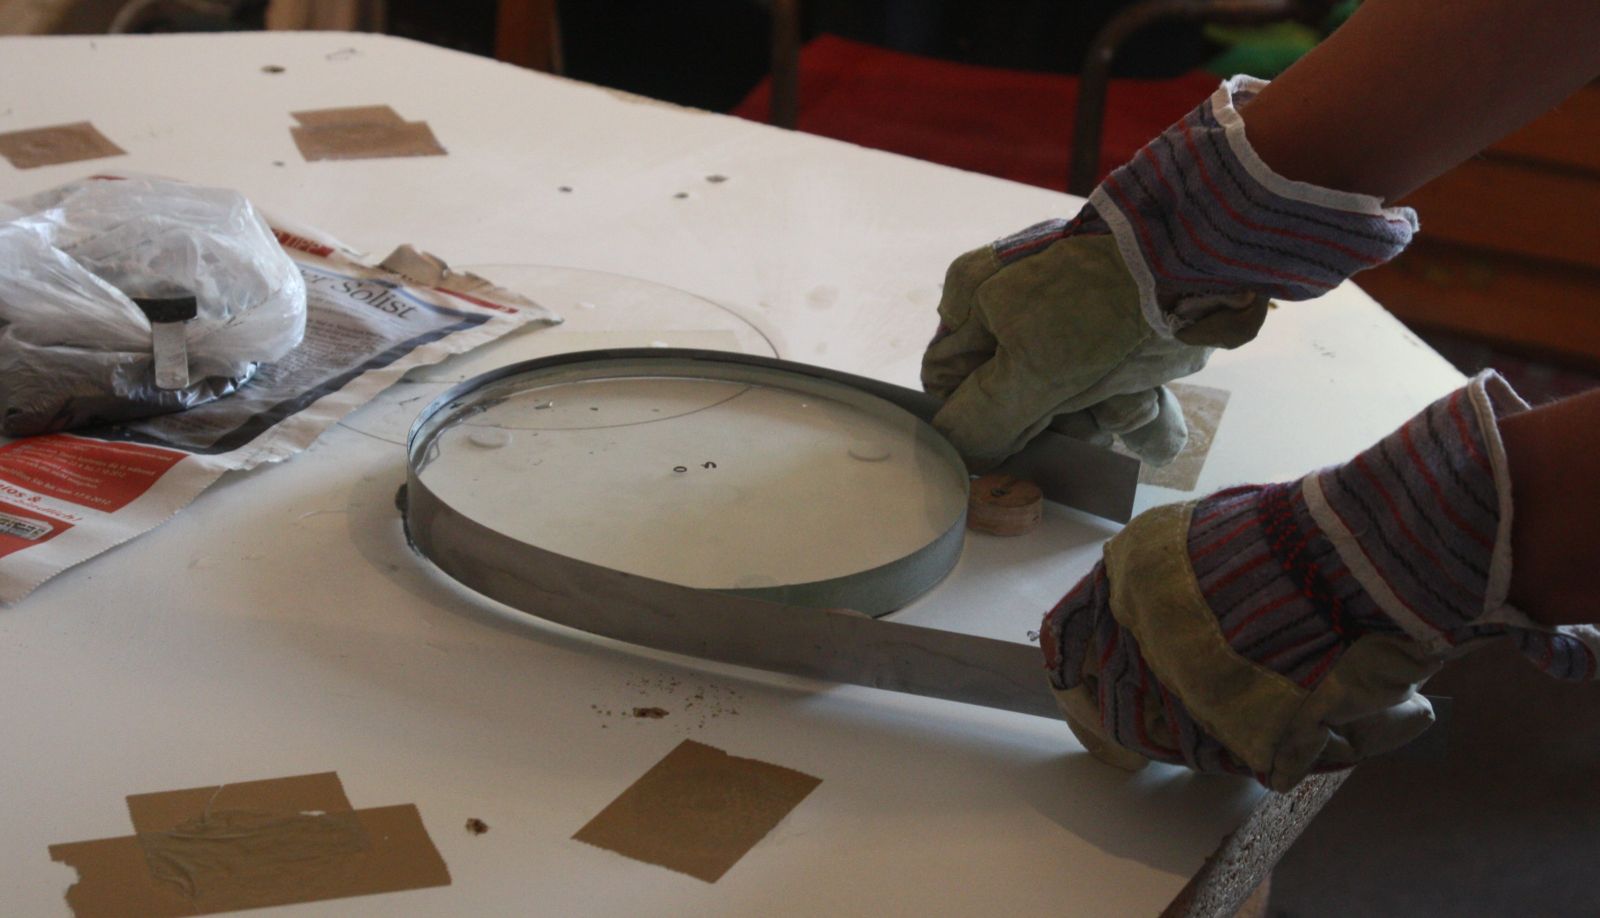
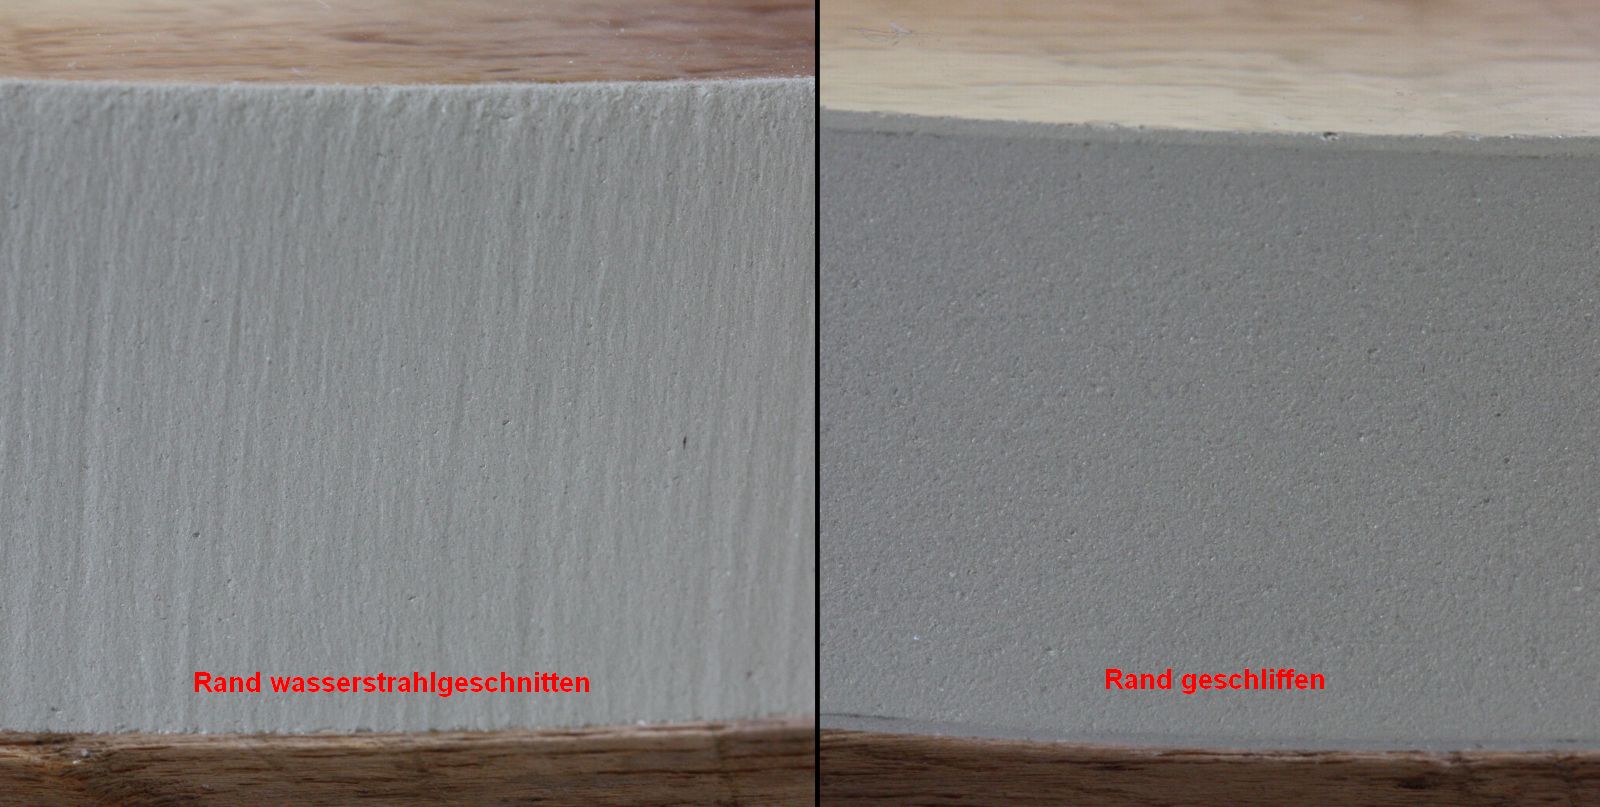
- Rounding the edge: If the edge is too rough, you can round it using a strip of metal and some abrasive (80 or 180 grit works well). Wet the metal strip, apply the abrasive, and repeatedly pull it back and forth along the circumference (see image of rounding off the edge , image of before/after comparison). See the presentation in the Astrotref forum for details.
- Disposal of the grinding paste: Never simply pour all the grinding paste down the drain! The grinding paste is heavy like sand, settles in the siphon, and clogs the drain in larger quantities. After each use, I wipe the carbide paste off the mirror and tool with a sponge cloth and wring it out in a bucket of water. Finally, I only empty the water from the bucket; the settled carbide paste goes into the trash, and only the residue is rinsed away.
Larger mirrors are often pregenedated with an angle grinder to save time, effort, and abrasives (observe safety precautions!). See details under 14" ultra-thin mirror.
Fine Grinding:
The fine grinding process serves to smooth the surface without significantly altering the existing radius of curvature. Each finer grit is used until the pits created by the previous grit are completely removed.
- Grit zises: You don't need to use every grit number, as each grit is a conglomerate of different-sized grains that scatter to some extent. A gradation of #80, #180, #320, #500 (or Microgrit WCA 15 m ), #800 (or Microgrit WCA 9 m ), and #1200 (or Microgrit WCA 5+3 m ) is sufficient. You can even use fewer grits and simply grind each step for a longer time. Advantage: You don't need to clean your work area too often, and it's easier to determine when a particular grit has been ground out.
- Neutral stroke: Movement and pressure distribution are equally applied to the center and edge of the mirror. This keeps the radius of curvature constant, allowing the mirror and tool to adapt better and better, ultimately becoming perfectly spherical.
- Alternating between MOT and TOT: This ensures that the surface is grpound evenly at the edge and in the center. The most common beginner mistake is exclusively using MOT grinding. This overgrinds the center, deepening it while the edge receives comparatively little action. As a result, during subsequent polishing, the edge may never be properly polished.
- Subdiameter tool: The grinding tool doesn't necessarily has to be the same size as the mirror. Any smaller diameter between 60 and 100% of the mirror's size will work. In this case, only tool on top (TOT) grinding is performed. The felt-tip pen test (Sharpie test) also helps here to find the "neutral stroke." Short stokes predominantly over the center of the mirror hollow out the mirror further, while more eccentric strokes with a greater lateral overhang flatten the curve.
- Stroke pattern: With a full size tool primarily use 1/3-1/2 strokes or circular/oval movements with approximately 1/4 to 1/2 lateral overhang. Vary the stroke length and lateral overhang (e.g., W-strokes) to better compensate for any deviations from the desired sphere. With subdiameter tool grind exclusively TOT with sufficient lateral overhang (see 40 cm tool on 60 cm mirror videos).
- Don't forget to rotate the mirror and tool to avoid asymmetries (astigmatism).
- Method: Here too, grind quickly with medium pressure, but not too hastily, so you don't lose control and the mirror wobbles or tips over. The glass has to be always be in full contact with the surface. From grit size 600 or 15 µm upwards, apply less pressure to avoid scratches. With the very finest grits, the weight of the mirror and your hand is sufficient.
- Refilling: Use powder sparingly, as excess abrasive is simply pushed out to the edge unused and thus wasted. Do not over-grind the powder; always add fresh powder promptly. Refill even the fine grits after a maximum of 3 minutes. Wipe off the used abrasive mixture with a sponge, sponge cloth, or similar. This prevents the newly applied powder from becoming clogged with the old mixture.
- Prevent sticking: As soon as the grinding resistance noticeably increases, sprinkle on some water. If the resistance increases significantly again after a short time, the abrasive is completely worn out. Separate the discs and reload them. Do not try to force the worn-out abrasive to last indefinitely, as the resistance will eventually increase dramatically due to water evaporation until it sticks (piston seizure). Especially with the finest grits, never let the discs stick together; always keep them moving.
- To separate stuck discs: Place the bottom disk in cold water and pour hot water over the top one. Repeat this several times until they separate on their own or with moderate pressure. If that doesn't work, let them soak in water for a longer period. No rushing! No force!
- Check for contact: Make a cross with a waterproof marker on the mirror and grinding tool and observe whether it disappears evenly. With equally sized disks, after one batch of MOT and one batch of TOT with 1/3 of a stroke, the cross should be almost completely gone or become at least uniformly fainter. This indicates that mirror and tool have uniform contact and are therefore sufficiently spherical. If the marker line remains in the center of the mirror, there is a depression in the middle; if it remains at the edge, the edge has no contact and therefore a larger radius of curvature (turned dowwn edge). With a subdiameter tool grind exclusively with TOT using 1/3 to almost 1/2 strokes and a 1/3 lateral overhang.
- When is a particular grit ground out? Each grit grade contains a certain proportion of coarser grains. Therefore, when viewing with a magnifying glass (or an inverted eyepiece), you will see larger pits than average on the surface. This is normal. The grit is ground through, when all the holes from the previous grit have been grind away. To determine this, you can mark some particularly large ones using the following method:
- Transition to the next grit size: Locate near the edge a large pit with a magnifying glass, mark it on the chamfer, and observe while grinding how it slowly disappears. Once this pit is grind away, the entire surface is done.
- When is the mirror completely ground out? After using Microgrit 9 µm or silicone carbide #800, the surface appears uniformly satin-matte under strong magnification (eyepiece) without any large pits. In grazing light, the edge and center shine equally brightly. To save polishing time, it is advisable to further refine the surface with Microgrit 5 µm (approx. grit #1200) and Microgrit 3 µm (approx. grit #1400). 20-30 minutes with 5 µm (approx. 10 wets) and 20-30 minutes with 3 µm are sufficient; excessively long grinding with these fine grits just increases the risk of scratches and sticking.
- Grind flat the mirror back: The mirror needs a rotationally symmetrical back surface so that the deformation during processing remains uniform, or more precisely, rotationally symmetrical. With a cylindrical, saddle-shaped, or otherwise irregular back surface, the raised areas will always print through at the same points from the back, risking astigmatism on the front surface of the glass. The thinner and larger the mirror, the more pronounced this effect becomes. Grinding the back side can be performed on a similarly sized or larger disc of glass, granite, or porcelain tile. It doesn't need to be perfectly flat with "optical precision"; it's sufficient, if the back surface makes contact with the counter-disc everywhere – to by seen by the even material removal using a felt-tip pen test. (See details in Munich Planschleif- Marathon , Borofloat Pizza flat grinding, or 13" back planing , or with mirror on top (MOT) on an oversized window pane without rotating it, see description by Alois in Astigmatism: Mirror back not quite flat! (The shape of the window pane doesn't matter, it doesn't have to be round).
Polishing:
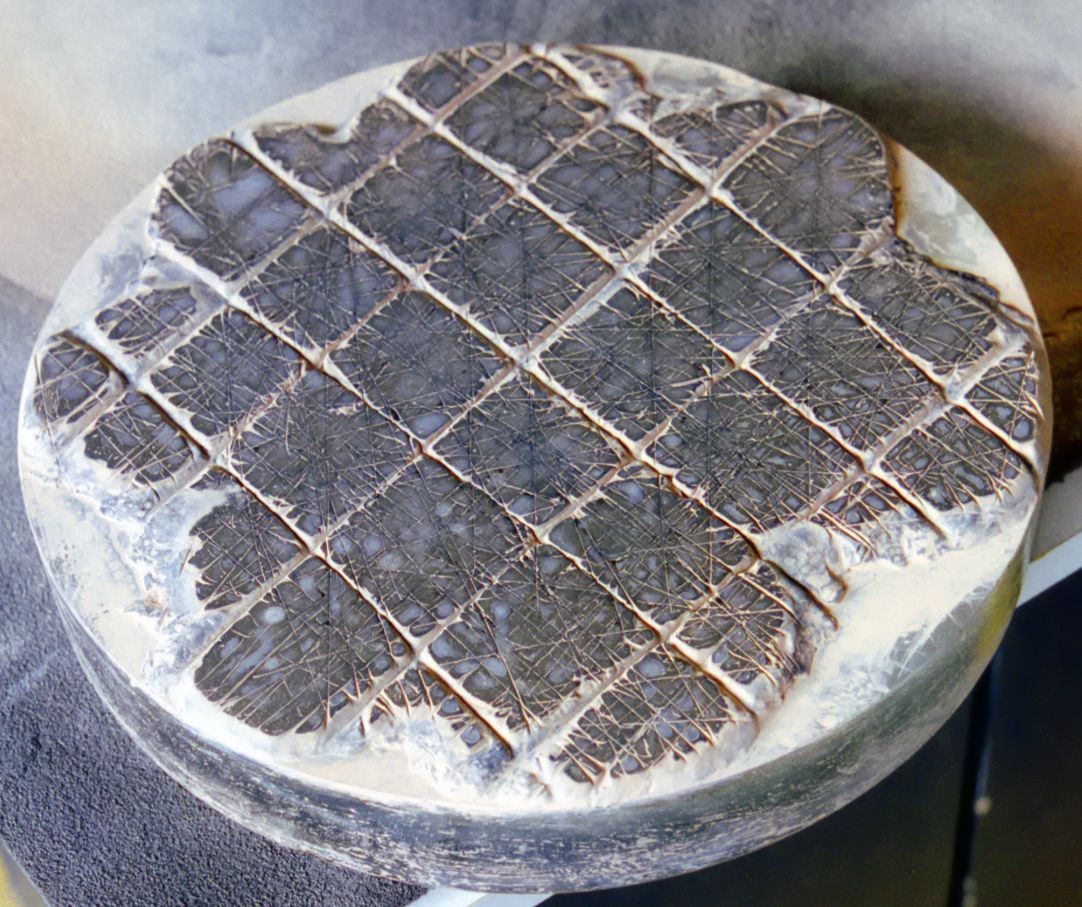
The sole purpose of polishing is, to remove the pits left over from the fine grinding process. For this, a 4-8 mm thick layer of pitch is poured onto the tool and fitted to the mirror. See the image description for the pitch lap preparation. During the process, the polishing particles are partially pressed into the pitch and cut through the glass like tens of thousands of microscopic knives. The goal is to choose the pitch layer shape and working method so that the center and the edge are polished to the same degree, thus ensuring the mirror remains spherical.
- Polishing powder: Modern fine cerium oxide (CEO) creates a beautifully smooth surface and works approximately 4 times faster than the old polishing red.
- Mixing ratio/application: I mix approximately 1 part CEO with 4-6 parts water in a glass and apply the suspension to the pitch with a new, clean brush. A thinner consistency is also possible. To prevent drying out, I regularly spray water on the mixture during polishing, so it becomes thinner over time.
- Amount of polishing compound: If the consistent resistance decreases (aquaplaning), or if the pitch lap becomes very sticky or grips unevenly, I add more CEO. This might be after 5 minutes or only after a good 30 minutes. Excess polishing compound doesn't speed up the process, but the risk of drying out is higher, and too much powder also saturates the pitch lap more quickly, causing it to harden and become prone to scratching.
- MOT and TOT: Primarily work with TOT, as this better polishes the crucial edge area.
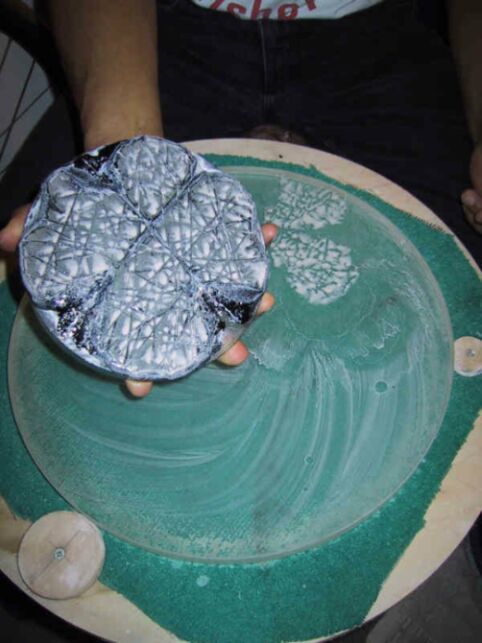
- Pitch lap contact: Warm fitting: Place the pitch lap in hot water until it softens slightly and then immediately place it on the mirror. Make small circular movements occasionally to prevent it from sticking. If it doesn't fit immediately, repeat the process a few times. Wait until it has cooled sufficiently before polishing.
Alternative: Cold pressing (only works if the pitch lap already fits quite well): When cold, leave the mirror on the pitch lap long enough for it to fit properly. Move it slightly from time to time to prevent it from sticking. Good contact is absolutely essential for polishing!
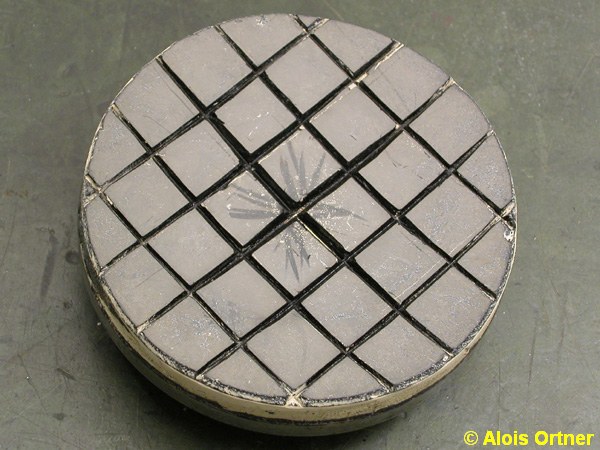
Pitch lap channels: Since the pitch lap naturally polishes less intensely towards the edges, the channels must not become narrower or even close up completely towards the center. It is better to make the channels wider in the center (see Alois's pitch lap image ).
- Work surface: Choose a firm, stable surface – not a flimsy table. The surface should be as flat as possible, with a hard, thin carpet, carpet tile, or similar covering for resudual unevennes. Do not use a 10 mm thick camping mat or any other "mattress"! The flatter the tabletop, the thinner the leveling mat can be. This is especially important with thin blanks, otherwise they will bend uncontrollably. Leave some space between the mirror and the side stops (do not clamp the blank!).
- Strokes: With a full size tool primarily use 1/3 to a maximum of 1/2 strokes or circular/oval movements with approximately 1/3 lateral overhang. Constantly vary the lateral overhang (W-strokes) to avoid zones. Never polish only center over center! With a subdiameter tool, polish exclusively TOT with sufficient lateral overhang to ensure the edge is adequately polished (see video polishing with a 40 cm tool on a 60 cm mirror ).
- Working method: Quickly but not frantically, with moderate but not excessive pressure. If the movement is too fast, the pitch lap slips too much; if it's too slow, you'll fall asleep. The longer you can polish continuously, the better. When polishing TOT, always turn the mirror on the base, and not just the base along with the mirror (see explanation here ). Keep the pitch lap moist at all times (e.g., moisten it with a spray bottle from time to time).
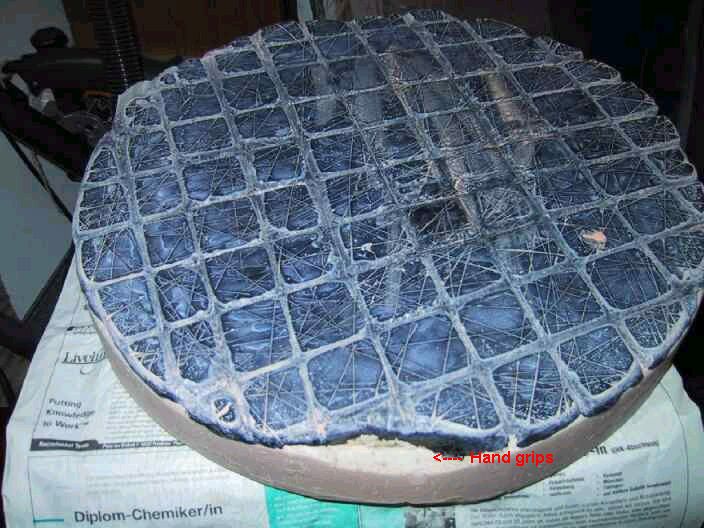
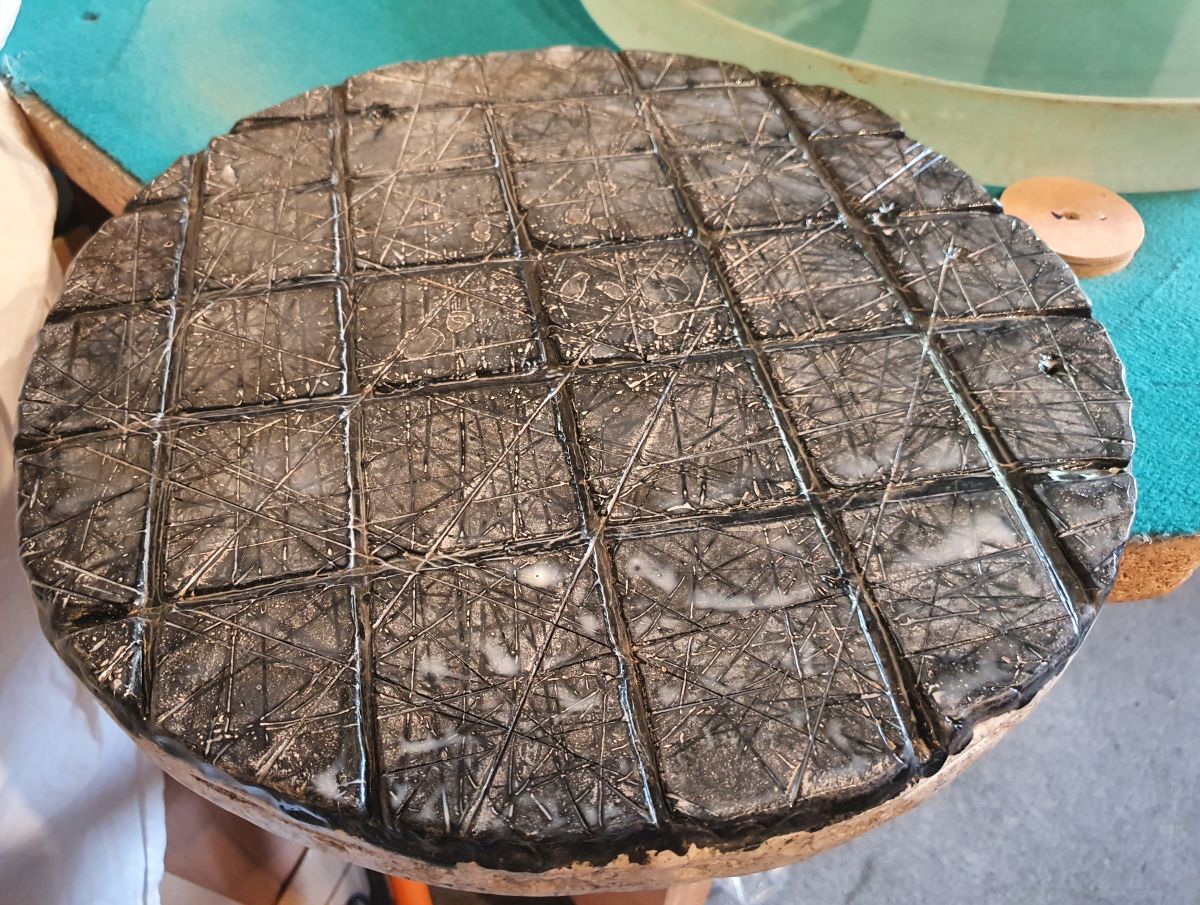
- Polishing resistance: The pitch lap must "suck" the surface, meaning it must offer a consistently high level of resistance. If it doesn't (aquaplaning or sticking), add polishing compound and/or refit it with heat. Ideally, press in a fly screen, or cut grooves into the pitch lap dipped in hot water with a knife (see image 1 or image 2 ).
- The first 20 minutes: The lamp's reflection from the ceiling must be visible across the entire mirror surface, even with the light shining perpendicularly. Once the mirror shines evenly and brightly, a Foucault test can be performed. If the edge remains completely dull even with TOT, the pitch layer at the edge is not correct, and instead, the center is being polished disproportionately strongly – resulting in a hole in the center and a lagging edge. In this case, widen the chammels in the center or add pitch to the edge and refit as needed (see Alois's tip ).
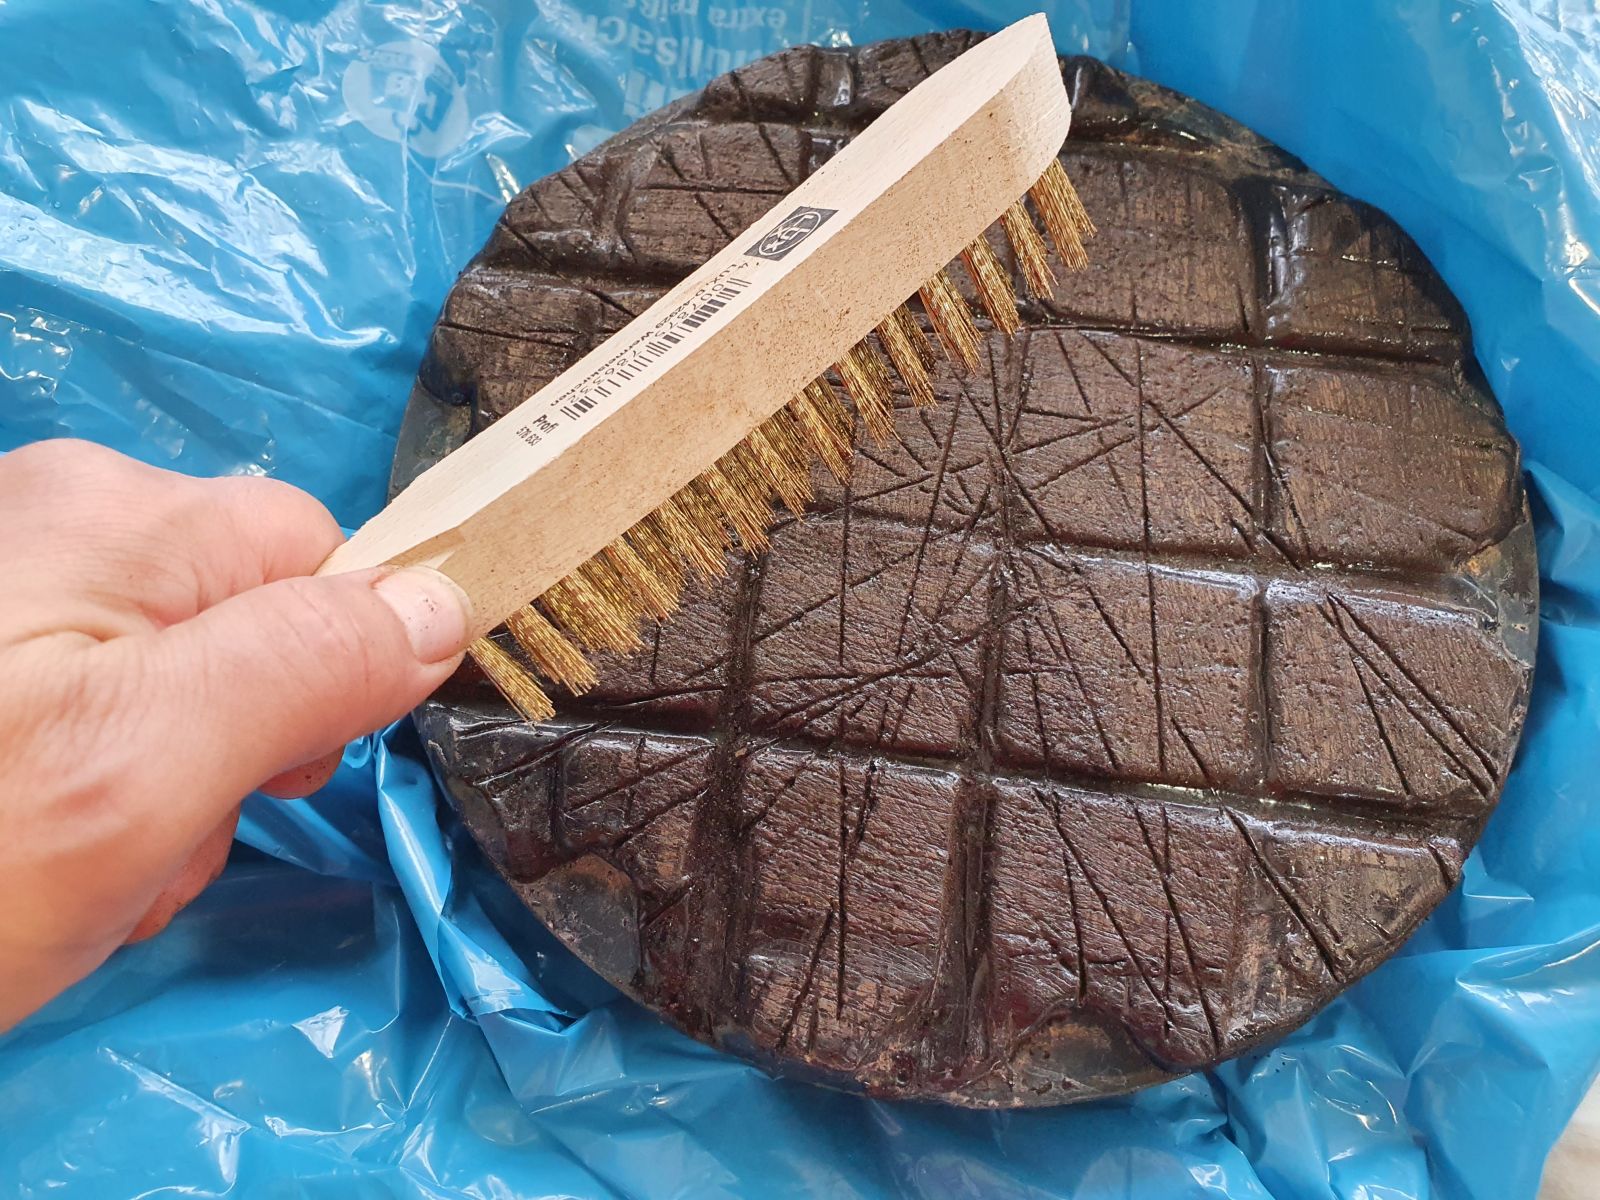
- Pitch lap care: Never let the powder dry out. After each polishing session, brush off the pitch skin with a clean nail brush or store it in water. Never leave the pitch lap exposed; always cover it (e.g., with cling film or in a clean plastic bag). Storing it in a water bath in a sealable plastic container is also popular. Always warm it up well before each new session. After many weeks of inactivity, the top layer of pitch becomes glassy and hard and no longer polishes smoothly. You can scrape it off with a razor blade, brush it with a brass wire brush (do not use a steel brush, as these tend to scratch), melt it down, or pour a new thin layer over the existing one. This "renewal" works just as well as making a completely new pitch lap.
- Scratches: Individual scratches have only a cosmetic impact, but they can sting the mirror grinder's ego. For assessment and avoidance, see the Astrotreff article .
- Rolled Edge: Recognizable in the Foucault test as a narrow, brightly shining edge 1-3 mm wide. The ruler test is even more sensitive . It is caused by plowing the pitch lap over the mirror edge. Harder pitch (e.g., a hardness of 28° at 20°C room temperature) is safer than softer pitch (23°) because it sinks in less quickly. Faster polishing with less pressure is safer than polishing too slowly with high pressure, as the pitch has less time to sink in. Excess pitch over the edge of the tool should be scraped off. Avoid applying pressure over the edge. Use a maximum of half a stroke, as otherwise too much tilting moment is created over the edge. Never leave the pitch lap eccentric, as the pitch will sink over the mirror edge and, during further work, will plane off the edge.
- Lagging edge area (turned down edge): (not to be confused with a rolled edge!). The term "sunken edge area" is often used, although this is somewhat misleading, as it usually doesn't actually lower the edge, but rather the center is disproportionately deepened. The result is a border zone typically 3-15 mm wide (even wider in large mirrors) with a significantly larger radius of curvature than the inner area of the mirror. This often leads to the edge area lagging considerably behind in the polishing process. To avoid this, the pitch layer must adhere evenly, and one must try to find the most neutral stroke possible, meaning the stroke length and lateral overhang should be such, that the center and edge are polished equally. The most effective method is to use TOT (pitch lap on top) with sufficiently long strokes and enough overhang to polish the edge and integrate it into the rest of the surface (circular or oval movements can also be used instead of strokes). Don't make strokes that are too short (less than a quarter stroke) without an overhang! This is a very common mistake, and not just made by beginners! The pitch lap naturally acts less at the edge than on the rest of the surface, as it can flow outwards more there. With consistently short strokes, the center becomes increasingly deep, meaning the radius of curvature becomes shorter and shorter in the middle, while the edge retains a longer radius.
Once the edge area has become deformed, it naturally takes quite a while to correct it using conventional methods. A faster approach is targeted polishing on the 80-95% zone to "level" the mirror back to a medium radius of curvature between the center and the edge.
My thumb polishing method: Apply polishing compound onto the edge and polish directly within the edge using your thumb (or a mini-tool) (avoid polishing the edge itself!). This procedure leaves a depressed zone directly within the edge, which must be smoothed again using the large pitch layer. See also the explanations and images for the 60 cm mirror and, in detail, the section on correcting the edge of a 50 cm mirror. Don't be alarmed by the resulting groove and stop too soon, otherwise the effect will be too small and you'll doubt the success of the method. It's best to polish with your thumb until the radius of curvature at the outermost edge is exactly the same as, or even smaller than, that of the rest of the surface, and only then smoothen it (see the Astrotreff article).
If you shy away from the thumb method, you can achieve the same effect with a mini-tool. This takes longer initially, but leaves softer transitions, which saves time during smoothing (see below under Parabolizing, Fine Correction).
Anyone with a full-size pitch tool can also make a so called ring tool: When pressing, the center of the pitch is indented using a central star made of, for example, parchment paper or clear plastic sleeve film. This way, when polishing with the tool on top, only the outer edge of the pitch is acting. For a detailed sumary of the methods, see the Astrotreff article " The troublesome edge problem ".
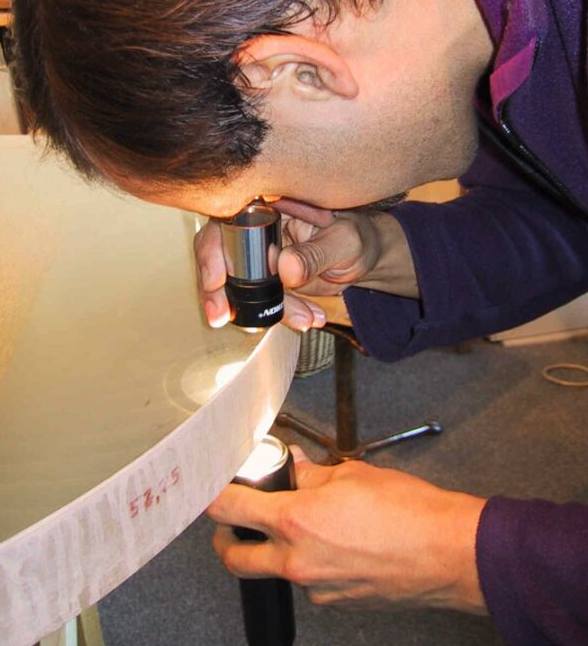
- Polishing progress: Examine the glass surface using the eyepiece reversed as a strong magnifying glass and a flashlight (see image) . The mirror must be as clean as possible for this (see cleaning procedure ). Pits from the last abrasive grit are very small; they shine like stars in the backlight. I have established the following scale to track the polishing progress:
0. Fine, satin-matte cratered surface. Only shines in grazing light. End of fine polishing.
1. Bulb reflection clearly visible even with perpendicular light incidence; the surface itself still appears satin-matte.
2. With a magnifying glass in the backlight of a flashlight: First shiny bridges between the pits.
3. Globular clusters
4. Dense Milky Way.
5. Crowded star field.
6. Loose star field.
7. Thinned star field.
8. Isolated pits.
9. Pits still occasionally found.
10. Polished our comletely.
It is best to begin assessing the progress immediately after the first polishing session and check the progress at least every two hours. This way you can best determine the correct angle to hold the lamp, distinguish between pits and dust or lint. This allows you to confidently decide when the mirror is fully polished out.
- When is the mirror fully polished out? On a clean mirror, the laser reflection is only very faintly visible in the dark, and no reflection at all in bright light. The laser reflection must be just as faint at the edge as in the center; otherwise, the edge is not yet fully polished! With a strong magnifying glass (eyepiece), all holes will have disappeared when viewed against the light. Only lint and dust will be visible. From this point on, address the mirror only with "Sir." Usually, the edge is polished last. Personally, I add another 1-2 hours to be absolutely sure, that any deep cracks are also polished out.
- Correction: First, clean the mirror until all pits are gone. Only then should you work on the shape (a common beginner mistake). Once the mirror is largely free of pits and reasonably spherical (no excessively recessed edges), you can proceed to...
Parabolizing:
In a parabolic mirror, the center of the mirror has a shorter focal length than the edge. With a moving light source, the difference in radius of curvature (ROC) between the center and edge of the mirror is D ROC = 1/8* D2/ROC, where D = mirror diameter and ROC = radius of curvature = 2 * f = twice the focal length. For a mirror with D = 200 mm and f = 1200 mm, ROC = 2400 mm is D ROC = 2.08 mm. Starting with an approximately spherical mirror, this can be achieved by further polishing the center to deepen it. There are basically two possible methods for this:
1. Classic Method: The pitch lap has the same size as the mirror. You polish the surface with long strokes and a lateral overhang. The longer the stroke and the greater the lateral overhang, the more the action is concentrated in the center (just like with coarse grinding). In extreme cases, this results in a hole in the center, and the rest remains spherical. If the strokes are too short, the mirror remains spherical, or in the worst case, develops a lagging edge. The goal is to find the correct stroke length and the correct variation of these strokes to develop the correction as evenly as possible (without zones). To prevent zone formation, you can chip away the pitch layer at the edge in a star shape.
2. Subdiameter Startool and TOT: This method is also suitable for parabolizing large mirrors. A "subdiameter Startool" is a pitch lap approximately 35-50% of the mirror's diameter, with increasingly wider channels towards the edge (see 15 cm tool on a 36 cm mirror, or 25 cm tool on a 50 cm mirror). The pitch lap acts thus strongest in the center and progressively weaker towards the edge. This creates a smoother transition to the individual zones and therefore prevents zonal errors.
- Stroke technique: W-strokes (TOT) for evenly deepening the center. Moving mainly center over the center hollows out the center more; eccentric strokes closer to the edge provide more correction to the outer areas.
- Edge pressure: By applying one-sided pressure with one hand to the edge of the pitch lap, the material removal can be concentrated on a specific area. This allows individual areas to be processed even with a larger pitch lap.
Foucault Test: Understanding the Foucault test is essential, especially for parabolizing. The shadows on the mirror surface indicate differences in the radius of curvature, meaning deviations from a perfect sphere. Therefore, one must get used to thinking in terms of "longer" and "shorter" radii of curvature, rather than "raised" or "sunken." For more details, see Foucault Tester and Understanding Foucault. The Foucault analysis software calculates the absolute level differences within the glass. I recommend the program FigureXP by James Lerch. For photographic analysis of the Foucault images, use the program Foucault XL (direct download) by Horia. See also the Astrotreff article Photographic Foucault Measurement.
There are no universally applicable rules on which stroke achieves the desired result, as there are too many influencing factors, such as pitch hardness, pitch lap shape, pitch lap size and thickness, room temperature, and the amount of polishing compound used. Ultimately, the technique employed by mirror makers is highly individual, and they develop their own methods, measuring at increasingly shorter intervals, to learn the effect of each stroke. Towards the end, one is more occupied with measuring than polishing. This dance for the last ten-thousandths of a millimeter is arguably the most exciting phase in mirror making.
Fine-tuning: Once the parabolic shape is nearly achieved, the remaining zones can be precisely corrected using Alois's minitool method without risking further distortion of the overall curve. For this, a small polishing tool ("minitool") is made that corresponds to approximately 2/3 of the zone width to be corrected (see Minitool Construction). You make slow, circular movements along the raised zone. The amplitude is adjusted so that the edge of the tool reaches the edge of the zone. Unlike back-and-forth strokes along the zone, these circular movements maintain the high surface smoothness. See Astrotreff article 1 and article 2 for details .
Let it crunch and good luck!
^ Top
Home | Imprint | Privacy Policy | about | .